Showing posts with label Garden to plate. Show all posts

Saturday, 27 July 2013

The recipe for my best salad ever - Grilled paneer salad with edible flowers

By Our Traveler Guide   Posted at  06:58   Salad No comments


I love cooking for friends. They bring out the best dishes from my kitchen. Ajit & Nandini are always generous with their praise for my salads, often telling me to either open a salad bar or start taking salad making classes. While I've done neither, I love to up my game when I'm making salads for them. You see the effect of positive reinforcement right there :-)

Last weekend, they were planning to get an Asian starter and main course for dinner, so I promised to make an Asian inspired salad. I had made up my mind to use the edible flowers from my garden. Edible flowers are quite the current culinary rage with chefs using them as garnishes in salads, drinks to making whole dishes using them. I wanted to use the beans flowers, rocket flowers, basil flowers along with the baby leaves of Malabar spinach, cinnamon basil (tastes similar to Thai basil), regular spinach and baby bok choy leaves.

I collected the flowers in a little bowl, soaked them in cold water to refresh them and dried them on a tea towel. The baby leaves were washed delicately in cold water and dried on towels. The bigger lettuce, rocket leaves were washed, chopped into bite sized pieces and dried on towels. So yes, salads mean more work than other dishes. Leaves need to be carefully washed and dried, which is half the battle won. You could say that a salad spinner could simply this process so much. I whole heartedly agree, but somehow I haven't got myself one yet. I guess this is why salads are so overpriced in fine dining restaurants - the work that goes into the leaves.


And yes, I used paneer in this salad. Purists can turn up their noses saying "HUH Paneer in an Asian salad"! But hey, it's better to use paneer instead of not-so-good tofu and marinated in Asian flavours, it could beat the pants off any tofu.

Grilled paneer salad with edible flowers
Serves 4-5

Salad ingredients
6 big handfuls of mixed salad greens (prepared as explained above- baby leaves left whole & bigger leaves chopped into bite size)
1 large green bell pepper, very thinly sliced
1 small onion or 3 shallots, finely sliced
2 small carrots, peeled and thinly shaved
2 plums, thinly sliced
200 grams paneer, sliced thickly into 8 long pieces

Edible flowers (optional)
Coriander flowers, beans flowers, rocket flower, basil flowers - soak in cold water, drain and dry on towels. I also used rocket pods.

Marinade for paneer
1 tsp finely grated ginger
3 tbsp soy sauce
3 tbsp rice wine vinegar
1 tbsp sesame seeds
1 tbsp honey
1/2 tsp freshly ground black pepper
big pinch of chilli flakes or chilli sauce as per taste
pinch of salt (if needed, as soy sauce has lots of salt)
2-3 lemongrass leaves, crushed
2 tbsp vegetable oil
Toss all the above in a large bowl and gently toss the paneer slices in this. Keep covered for 15-30 mins.

Marinade for salad - add all the following ingredients to a jam jar and shake well until you get an evenly mixed dressing
2 tbsp olive oil
3 tbsp soy sauce
3 tbsp rice wine vinegar
2 tbsp honey
chilli flakes
1/2 tsp grated ginger
1 garlic clove, finely grated
2 tbsp finely chopped coriander
freshly ground black pepper

Grilling the paneer
Grease hot stove top grill pan / grill / tava. Once the pan is very hot, place the marinated paneer slices (after removing the lemon grass stalks from marinade) in a single layer, press gently with a spatula and do not disturb for 1 minute or so, until the grill marks appear. Turn and grill other side similarly. Remove from the grill pan and keep aside.

To assemble salad
Place the prepared salad greens in a large bowl. Scatter the bell pepper, carrots, plums over the leaves. Pour 3/4th of the dressing and toss gently. Arrange this on a platter. Place the grilled paneer and top with edible flowers. Pour any remaining dressing & marinade over the top.

Verdict
The paneer was the star of the dish, marinated in those Asian flavours and the stunning grill marks. The others lent an excellent supporting role and the dressing brought the whole dish together. A small note of appreciation for the cute flowers who added a lot of prettiness to the dish. We LOVED this dish and wished there was more :)

Wednesday, 17 July 2013

{Coming up} A new series on Kitchen Gardening

By Our Traveler Guide   Posted at  05:59   kitchengarden No comments


Picture this -- a wide pot with fresh baby spinach, a tomato plant that gives you sweet cherry tomatoes, fresh mint and basil always at hand for that fresh mojito or to garnish your pasta dish, trays of lettuce from which you can make freshly plucked salads. Kitchen garden is never about having a big farm or a large garden space. Well, if you do, then you can be entirely self sufficient, but a small kitchen garden can even start on a window sill. All you need is sun, decent soil and a little time of your day and in no time you will be addicted. 

If you have any questions for me on kitchen gardening, please leave a comment below, and I shall try and answer those in the forthcoming series - which as of now, I think will be a fortnightly affair. I don't claim to be an expert in gardening. Far from it, actually! I would love to explore this topic and encourage more people to grow little somethings in their homes and gardens. It is an extremely fulfilling experience and I just want to share it with you! So please write back to me on what you would like to hear about :)

Saturday, 17 November 2012

Yard long beans curry : Karamani curry - Garden to plate

By Our Traveler Guide   Posted at  01:00   Vegetable : Beans No comments
Yard long beans (Chauli / Karamani) have not been my most favourite vegetable, because they are often tough and stringy when bought from the supermarket. Ever since I started growing these in my garden, I've changed my opinion about this vegetable. 


Seeds from Auchan (formerly SPAR) Supermarket, Bangalore


For one, it is a hardy plant, producing a good yield once it starts flowering and fruiting. It's always fun to search for the green delicate long beans among the green leaves and there are a surprise few always hiding in the middle of the foliage. You can pluck them when still tender which means they cook in no time. The overlooked beans can always be used for the mature seeds inside, which you can use in a soup or a vegetable dish. 


I may have said this before, but to avoid any confusion, I must clarify that, 'Curry' in the tamil / Tambrahm cuisine parlance means a dry saute, where boiled or raw chopped vegetables are added to a hot oil after a simple tempering of curry leaves, mustard seeds, udad dal and dried red chillies. And once the vegetable is nearly cooked, a sprinkling of fresh coconut completes the dish. It is almost like a lightly cooked salad and not a gravy dish. Also, it is one of the easiest ways to prepare any vegetable, while retaining it's nutrition, taste and colour.


Karamani Curry / Yard long beans curry
Printable version here
Serves 2-3
Time taken : Under 20 minutes

Ingredients

1 tbsp of oil ( I used organic coconut oil)
Pinch of asafoetida
2 dried red chillies, broken
1/2 tsp mustard seeds
1 tbsp udad dal
2 cups of chopped yard long beans
3/4 tsp salt
1 tsp sambar powder
2 tsp fresh coconut 

Directions
  1. In a large wok / kadai, heat the oil. 
  2. Add asafoetida, immediately adding red chillies, mustard seeds, udad dal. 
  3. Once mustard seeds splutter and dal turns golden, add the chopped beans, salt - stir well and sprinkle water, cover and cook for 8-10 minutes on a low flame. 
  4. Check on the beans every 3 minutes or so, sprinkling some water, if it is too dry or catching at the bottom of the pan.
  5. Once done (tender, but still retaining some crunch), sprinkle sambar powder, stir to mix well.
  6. Remove from flame and garnish with coconut.
  7. Serve with rasam-rice or sambar - rice.
Useful information about growing yard long beans on the USDA site

Sunday, 19 August 2012

Crustless Quiche using homegrown Swiss Chard

By Our Traveler Guide   Posted at  20:45   Recipe level: Easy No comments
Crustless Chard Quiche 


There's something wonderful about quiches, they fit perfectly as a meal for any time of the day - be it breakfast, lunch or dinner. The only thing that probably deters people from making this is the mess (well, a little) of making and blind baking the crust and the quantity of butter that goes into it and the thought of burning all that butter off the next day on the treadmill. Well, may be that's just me but yes, if the crust is eliminated, the quiche becomes healthy, quick while still tasting delicious. It's also a great way to use up spinach, mushrooms, corn and bits of any cheese you may have in the refrigerator. 

Freshly plucked swiss chard


I used chard because they were just plucked that evening, all fresh and luscious green, you could by all means use spinach, or a combination of other greens and add any other lightly sautéed vegetables like zucchini or bell peppers to this. A spinach quiche is also the best way to make kids eat their greens up without much fuss.


Recipe for Crustless chard quiche 
Serves 2-4

Ingredients
1 tsp olive oil
3 cups of roughly chopped chard (include tender stalks too) or spinach
1 medium onion, sliced
1 clove garlic, finely chopped
3 medium sized eggs
3/4 cup milk 
1/2 cup fresh bread crumbs
1/2 cup cheese (grated or crumbled, as per the cheese used. I used fresh mozzarella, crumbled)
1/2 tsp salt
3/4 tsp ground pepper
Handful of fresh herbs, finely chopped or 1 tbsp dried herbs (Oregano and thyme)

Directions
  1. Preheat oven at 180C. Grease a 6" pie dish or a baking tin.
  2. In a pan, heat olive oil. Add the sliced onions and garlic, lightly saute for 3-4 minutes on medium flame, until onions are soft. 
  3. Add the chard or spinach and saute for 2-3 minutes until just wilted.
  4. In a bowl, whisk the eggs, milk, salt, pepper, herbs well and add the crumbled cheese.
  5. Transfer the chard mix from the pan into the bowl and mix with a fork.
  6. Pour into the greased pie dish. Top with bread crumbs, more freshly ground black pepper and dried herbs and bake for 20-25 minutes until a knife comes out clean.


Serve with a salad for a light lunch. 
Crumbled feta pairs well with spinach and it's a classic combination in Greek cuisine. 
You can easily scale up the recipe and bake in a bigger dish with increased baking times. Leftovers make great breakfast, just microwave for 30 seconds or so before serving.

Tuesday, 3 April 2012

Summer salad from my garden : Carrot, greens and watermelon

By Our Traveler Guide   Posted at  01:57   Vegetable : Carrots No comments


My first story (and photographs) for BBC Good Food India magazine covers the restaurant Chez Mariannick, in the Off the Eaten Track section. Do check the April 2012 issue. If you love good food, you must subscribe to BBC Good Food online. And I'm not saying this only because I'm writing for them. This magazine is full of inspirations for enthusiastic cooks.


---------------
After indulging on food through the weekend (trying out new restaurants, having friends over or going out to friends' places) Sunday evenings are mostly just salad based dinners. Neither do I have the appetite or the energy or enthusiasm to cook and eat anything elaborate on a Sunday evening. 
It was no different this Sunday evening, when I went up to the garden, plucked a few things, soaked them in a sink full of water. 


Washing the freshly plucked produce
Basket of freshly plucked produce sitting in a water bath
Come supper time, I quickly put together the ingredients to make a deliciously refreshing salad, perfect for the hot evenings in Bangalore. I must say that my salad making skills have been encouraged by two factors. One, the terrace garden that is always a source of a few fresh salad greens, and two, my two friends - Ajit & Nandini, who are full of praise for any salad I put together. So I've decided to blog more of my impulsive salad making sprees.


Growing the multi coloured carrots has been a most fun experience, because when you pull it out of the ground, you don't know which colour it is going to be. Also, the purple carrots, when peeled are yellow inside, as shown in the picture below.


The purple carrot is yellow on peeling!
Now, rocket / arugula / rucola, I'm so in love with this spicy salad green, that I simply cannot have enough of it. I've let the first batch of rocket sown grow into a jungle, literally, so I can let them go to seed and then collect the seeds to share with friends, and sow more rocket in my garden. I've been using them in every salad, made pesto, added it to pasta, and even to a mint and coriander chutney with brilliant results. I'm surprised how my crush over rocket is sustaining over the last 9 months. Some nurseries in Bangalore sell the seeds. If you are in and around Whitefield, I'd love to share some of the rocket seeds with you. It's extremely easy to grow, even in pots. Give it a try!


Summer fresh salad with Carrots, Herbs and Watermelon
Serves 2
Time taken - Under 10 minutes, apart from the time taken to wash and dry greens


Ingredients
3 medium carrots - peeled and shaved
Small bunch of fresh rocket leaves ( you can substitute any other lettuce varieties or baby spinach)
Small bunch of fresh lettuce leaves
Handful of fresh herbs like thai basil / lemon basil 
Handful of fresh mint
Handful of roasted almonds
2 cups of watermelon cubes


Dressing
3 tbsp apple cider vinegar (you can substitute with red wine vinegar or balsamic vinegar)
1 tsp of pesto (or use 3 tbsp finely minced/pounded basil in 1 tbsp olive oil)
2 tbsp extra virgin olive oil
1 tbsp honey
Pinch of ground black pepper
1/2 tsp salt


Directions


Wash the greens and herbs in a sink full of water 2-3 times. Use a salad spinner to dry the leaves or spread between two clean absorbent kitchen towels for up to 30 minutes before proceeding with recipe.
I used an orange, purple and yellow carrot each because that's what was the day's harvest from my kitchen garden. You can use any carrots that are in season. I shaved them using a vegetable peeler. 
Roughly chop the dried salad greens and herbs into bite sized pieces.
In a large bowl, mix the salad greens, thai basil, mint and shaved carrots. Keep aside.
Mix all the ingredient for the dressing in a small glass jam jar and give it a good shake. 
Just before serving, pour the dressing over the greens-carrots in the bowl. Toss well.
Divide into two plates, top each plate with half the roasted almonds and the watermelon cubes.


Tip:
Adding grilled chicken or tofu or paneer or chickpeas will make the salad a heartier meal


[All pictures for this post taken on iPhone. I've realised that if I have to blog more often, iphone pics are my best friend :)]


Shopping notes:
All kinds of salad greens (except for rocket) are always available fresh at Namdhari's
Apple Cider Vinegar - I use Waitrose brand from Hypercity

Saturday, 10 March 2012

On growing strawberries and recipe for Eggless Strawberry Yogurt Cake

By Our Traveler Guide   Posted at  03:55   seasonal eating No comments
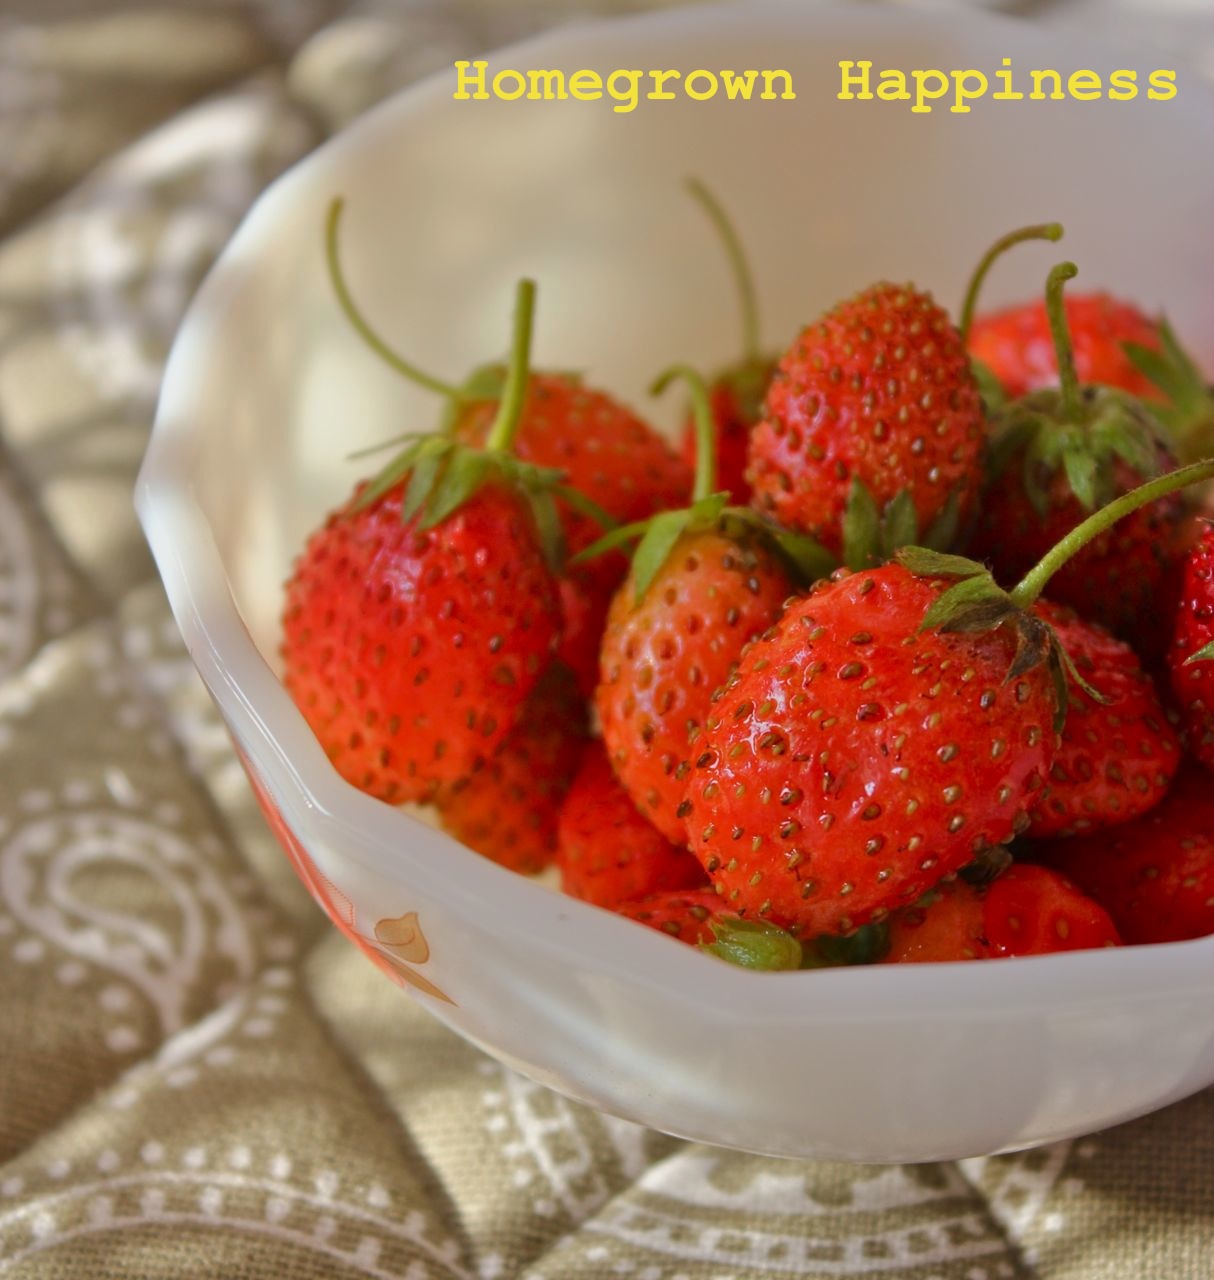
My three year old son and me have a morning routine nowadays. After his drink of milk, we go to the garden and check if there's any red peeking out of the strawberry patch. If we didn't do this, the squirrels and ants, who have been blessed with a better foraging sense than us human beings, will get to the juicy berries before we do. We don't get too much, but a small handful a day, to add to cereal or to make a couple of muffins, or to eat as it is. The latter doesn't happen often as I am not very tolerant to acidic fruits and I'm yet to taste lusciously sweet strawberries grown in India. Here, strawberry needs sugar as a partner to make it more palatable. 


But, however little, that sense of joy we get from having watched something grow for nearly eight months, and finally bearing fruit, is such a fulfilling one. These strawberry saplings were planted in June and they quickly propagated and covered the ground, but there was not a single flower in sight even after six months. The newbie gardener that I am, I quickly lost hope. Patience is clearly not one of my virtues, hence I stand to benefit a lot from gardening. I am slowly learning that nature doesn't work at the speed of a 4Mbps internet connection. It takes its own sweet time. And what sweeter time than spring time? I don't need my neighbours to drench me in permanent colours (albeit organic) and hose me with tons of water, to announce the arrival of spring (I'm talking about the one festival I dread, Holi). The new blooms and fruits in my garden had already whispered to me a few weeks ago that spring is not far away...


Just plucked strawberries basking in the morning sun


A few years ago, if someone told me that I could grow strawberries in India, I would have laughed it off. But Bangalore weather is somehow to conducive to growing almost anything. Like my friend @abithaanandh tweeted this morning -
 "Am willing to overlook 11pm deadlines,bad infrastructure,forever 90s music loop- all 4 those few precious hrs in the garden! Tk U #Bangalore"
It is so true. I'll continue to grow strawberries next year too. I'm told they bear better fruit in the 2nd and 3rd year. Only, I'll be growing them in hanging baskets, so I dont have to compete with the ants to pluck the fruit!


I've been wanting to bake a strawberry cake for a while now. Not the types where the fruit is pureed in, but stands out like red jewels, slightly mushy from the baking and a burst of flavour in the mouth, when you bite into it. And somehow, I wanted to pair it with yogurt as I couldn't use eggs in this. A Foodblogsearch didn't find me the kind of recipe I had in mind, so I did my own improvisation. Yesterday afternoon, just before the baking session, I found a bottle of strawberry essence at Nilgiri's, so the fruit, the essence and the jam made the taste pretty intense, but not in the cloying sort of way.


The recipe I'm sharing with you seems to be the most low-fat and healthiest version among all those that I went through as a result of my various searches.

Pin It


This is a tea cake or a weekend breakfast cake. I'm not asking you to believe that it's dessert. Umm...may be with ice cream, yes :)


The texture was very moist and delicate despite not using eggs or butter.
Do give it a try before the strawberry season bids us a goodbye.


Recipe for Strawberry-Yogurt Cake
Eggfree / Eggless / Lowfat
Tea time or breakfast cake
Makes 1 tall 8" cake


Ingredients

¾ cup yogurt
¼ cup milk (skimmed or toned, as you prefer)
¼ cup rice bran oil (or any cooking oil)
¾ cup sugar
2 generous tablespoons of strawberry or mixed fruit jam
1 tsp Strawberry essence or mixed fruit essence (gives a more fruitier flavour, if you don’t have either, use vanilla extract 1 tsp)

1.5 cups all purpose flour OR 1 cup AP flour + ½ cup whole wheat flour (atta)
1 tsp baking powder
½ tsp baking soda
Pinch of salt

Roughly 1 cup finely diced strawberries
Handful of tutti-frutty (optional)

Directions

  1. Preheat oven at 180 C
  2. Grease an 8” round cake tin. If using silicon pan, no need to grease.
  3. In one bowl, whisk the oil, yogurt, milk, sugar and jam.
  4. In another big bowl, sieve the flour, baking powder, baking soda and salt. Make a well. Add the whisked wet ingredients. Fold until they come together. Over enthusiastic beating / whisking is better avoided.
  5. Towards the end, fold in chopped berries and tutti-fruity.
  6. Scrape the batter into the greased tin / silicon mould and bake at 180 C for around 45-55 minutes, checking with a tester if it comes out clean.
  7. After 10 minutes, unmould and cool on a wire rack.
  8. Cut into wedges, dust with icing sugar and serve with tea.

The same recipe will work with raspberries or blueberries to make a blueberry yogurt cake or a raspberry yogurt cake.

See what people have to say about this cake! (via Twitter)


Thursday, 8 March 2012

On how the monstrous zucchini got Tambrahm-ised

By Our Traveler Guide   Posted at  04:00   Vegetable : Zucchini No comments
[Those who voted for me and got me into the final 6 Healthy Cooking Blogs, thank you! In the finals, my blog as of now is 5th. Feels kinda pointless asking to vote now as the better blogs lead by tons of votes, but if you've loved my work here, go ahead and vote for me. Directions here ]

My garden always surprises me. Which is why I like to take my morning tea up to my terrace garden, perch myself on one of the tiny stone benches and sharing that morning moment with the plants to the background music of the birds. While I try to get a few sips of my tea, a little fruit, a new flower and small shoot will beckon me to admire it. And I will go take a look at them while my tea sits on the bench going cold. Every morning, a new surprise, however little, that makes me smile and sets the mood for the rest of my day. It is an exercise in positivity. Many flowering plants that I assumed were dead, suddenly start showing signs of life as spring is round the corner. My lavender bushes, since 9 months didn't show one sign of flowering and I thought "Damn! The nursery fooled me with a non flowering variety!" And I was proved wrong when the prettiest lavender flowers bloomed this month. If there is a tiny bit of life left in the plant, come spring time and it will revive. What's more beautiful in life than hope, after all?

And then sometimes a garden makes you laugh out loud. Like this monstrously huge zucchini that had been hiding under the huge leaves for nearly a month, that had missed my keen scrutiny each morning only to be found by my driver a few days ago. He showed me this green thing nearly as big as a new born baby-and I shuddered! And then laughed so hard when I knew that it was indeed a zucchini that had hidden away from all prying eyes and grown so big~nearly 2.5 kilos.

Not to show off my (old) iPhone but to give you size perspective :)
This is after a third of the zucchini has been chopped off


I kept it on my table to admire it's beauty for the first 2 days, then it spent a few more days in the refrigerator. When other vegetables came in from the supermarket, this big fellow could no more occupy precious refrigerator real estate and he had to be brought out. 

The husband is not a big fan of zucchinis and though we had shared enough jokes about how big this sly vegetable had grown, his enthusiasm stopped there. When I was cutting it up this morning, he said, "Please, I don't want this for lunch." Since there are very few things he doesn't like, I usually indulge his whims, but this time, I just smiled and said "We will see."

Over the six years that I've been food blogging, I've seen several bloggers making Zucchini thogayal. But zucchini, in India, has always retailed at around Rs.100 a kilo. At that price, why on earth would I want to puree it to death in a blender. I wanted to see and enjoy this vegetable in salads, pasta and such. But thogayal, no way!

But when you have a 5 pounder zucchini sitting on your counter top, the thogayal did indeed seem like a good idea. And boy, did it taste good or what.

Zucchini Thogayal and Zucchini Curry (both recipes below)


For the uninitiated, thogayal or thuvaiyal is a Tambrahm style of converting mildly unpalatable vegetables (Chow-chow, pumpkins, ridge gourds, bottle gourds etc) into chutneys so Tambrahm uncles will mumble good things about the food even if they are eating some vegetable they don't like. Many blogs will say you can eat Thogayal on bread or with idli or dosai or chapathi or pasta or just about anything. I wont say they are lying. But there is only one way to really savour this. Hot rice, gingelly oil (yes, oil and NOT ghee) and thogayal and a roasted appalam on the side.

And the zucchini hating husband tasted some of it, hesitantly, after he had eaten beans curry-rice and rasam and said "Please keep some for me, I want to eat this for dinner."


I guess after this, I can well call this 5 pounder- 'Zucchini Iyer'.


Ingredients
2 medium sized green zucchinis 
1/4 cup scraped fresh or frozen coconut
a tiny piece of tamarind soaked in 2-3 tsp of water
2.5 tsp gingelly oil or any other cooking oil
2 tbsp + 1 tsp udad dal
4 medium dried red chillies
1/2-3/4 tsp salt
2 sprigs curry leaves
Fat pinch asafoetida
1/2 tsp mustard seeds
1 green chilli

Directions

  1. Chop the zucchini into medium sized cubes. No need to peel the skin.
  2. Heat 1/2 tsp oil in a pan. Add 2 tbsp udad dal and red chillies and saute on medium heat until the udad dal is golden brown. Remove onto a plate and cool for few minutes.
  3. Heat the remaining 1 tsp oil in same pan. On high heat, scald the chopped zucchini by tossing it around for a minute or so.
  4. Reduce the flame, add 1/4 cup water, pinch of salt, cover and cook till zucchini is tender and fully cooked.
  5. In small mixer-grind the fried udad dal-red chillies, soaked tamarind and coconut to coarse paste. To this add the cooled cooked zucchini, salt and scrape the sides of the mixer and grind to a paste. Remove this into a bowl.
  6. Heat 1-2 tsp oil in a tempering ladle or small kadai. Add pinch of asafoetida, mustard seeds, once they splutter, add curry leaves and udad dal. Wait for dal to turn golden and transfer the tempering over the thogayal.

Notes
Traditionally a lot more coconut is used, so you could use as much as your health consciousness permits.
If you know this one recipe, you will have at least one way to deal with most of the vegetables that the world at large considers boring.


Another way to Tambrahm-ise Zucchini : Zucchini Curry

A small clarification here. In Tambrahm cooking, a curry is not a gravy dish that Brits seem to love. It's a simply prepared dry saute with minimal spices and the star being the tempering. I pressure cooked this for a bit as it was a mature zucchini, if your's is tender, you can simply add it raw and cover and cook till done.


  1. Place 1.5 cups of zucchini pieces (small) in a container in a pressure cooker. Don't add water to zucchini. Pressure cook for one whistle. 
  2. In a kadai, heat 2 tsp oil. Add pinch of asafoetida, 2 dried red chillies, 1 tbsp udad dal, few curry leaves, 1/2 tsp mustard seeds and saute till udad dal is golden. 
  3. To this add the cooked (or raw) zucchini, pinch of turmeric (optional), salt and toss gently to coat with tempering, on a low flame.
  4. Add a bit of fresh coconut and it's ready to serve. Those who find this very bland can add 1-2 tsp of sambar powder or rasam powder towards the end and give it another toss.
See what people on Twitter have to say:

Saturday, 18 February 2012

Morkeerai or Spinach and yogurt stew : Garden to plate

By Our Traveler Guide   Posted at  01:54   Yoghurt No comments
TamBrahm cooking or the recipes from Tamil Brahmin households could well vary from house to house. While I've eaten Tambrahm food all through my growing years (albeit sometimes reluctantly) - when this recipe for Morkeerai came to me for posting in Tambrahmrage Cooks - I was surprised I've never eaten this. I'd never even heard my grandmum, aunts or mum mention this ever. 


Spinach patch
Chilli Plant
Plucked and ready for the recipe
Spinach seeds

Since we have having a good crop of spinach and chillies currently in our small terrace garden, this seemed like the perfect way to use freshly grown produce. The procedure to make this Mor-Keerai (more:buttermilk and Keerai:spinach in Tamil) seemed to be like that for Mor-Kozhambu. Grind fresh spice paste with coconut, add it to sour yogurt / thick buttermilk and bring to a simmer. Spinach was an addition to the regular mor-kozhambu recipe.

I loved the subtle flavours of this stew. You can use any seasonal fresh greens such as amaranth, water amaranth, agathi keerai or Bathua. I have promptly passed this recipe on to my mom.


 More Keerai served with Carrot Curry and Brown Rice


Recipe for Mor Keerai
Spinach and yogurt stew
Serves 3-4 
Originally posted on our other blog 


Ingredients
2 tbsp chana dal
1 tbsp raw rice
1/3 - 1/2 cup coconut scrapings
2 sprigs curry leaves
Handful of coriander leaves
4-6 green chillies
2 cups thick yogurt
3 packed cups of finely chopped spinach leaves
1 tsp oil
1/2 tsp mustard seeds
2 tsp udad dal
pinch of asafoetida
1 tsp salt
1 tbsp pure coconut oil (optional)


Directions

1. Soak 2 tbsp chana dal and 1 tbsp rice for about half hour.
2. Grind to a fine paste: 
1/3 - 1/2 cup coconut scrapings 2 sprigs curry leavesHandful of coriander leaves4-6 green chillies-depending on how spicy they are& the soaked chana dal and rice.
3. Mix this paste into roughly 2 cups of thick sour yogurt
4. Wash and finely chop spinach leaves to get 3 cups packed
5. In a kadai, heat 1 tsp oil-temper 1/2 tsp mustard seeds, 2 tsp udad dal and pinch of asafoetida. Add chopped spinach with a pinch of salt. Saute for a few minutes until wilted. Sprinkle some water and let the spinach cook thoroughly. 
6. Add the curds with spice paste to the cooked spinach and salt as required. Once this starts frothing, remove from flame and garnish with pure coconut oil. Dont let the curds boil or it will split.
Serve with hot rice and a vegetable curry.


Back to top ↑
Connect with Us

What they says

© 2013 Cook Crowd. WP Mythemeshop Converted by Bloggertheme9
Blogger templates. Proudly Powered by Blogger.