Showing posts with label easy bakes. Show all posts

Sunday, 1 December 2013

Easy Strawberry-Blueberry Tea Cake

By Our Traveler Guide   Posted at  04:03   Recipe level: Easy No comments
Yesterday, I had the 3rd edition of my bread baking workshop - Breaking Bread. We made a rocket-basil-yellow cherry tomato pizza from scratch. Fluffy golden Mumbai pav was served with bhaaji. The cinnamon rolls we made today were turned extra special by adding raisins and orange zest soaked in brandy to the cinnamon-sugar mix. To add to the party we also made a little pull apart loaf using the left over dough spread with chocolate paste- which came out all ooey, gooey and chocolatey and made all the ladies go OOOOH The last one in the bread party was a braided bread dressed with sesame seeds.

Facebook Album: Photos from Breaking Bread -2 

 The best part of the afternoon for me was one of the participants telling me that the pizza was as good as the Toscano pizza and I'm a big fan of Toscano, they serve the best pizza in Whitefield. Photos of Breaking Bread-3 After 4 hours of talking, kneading, baking and walking to and from the oven - I'm invariably wrung-out tired and want to retire into a cave and snooze the whole of Sunday. But rarely does that happen.


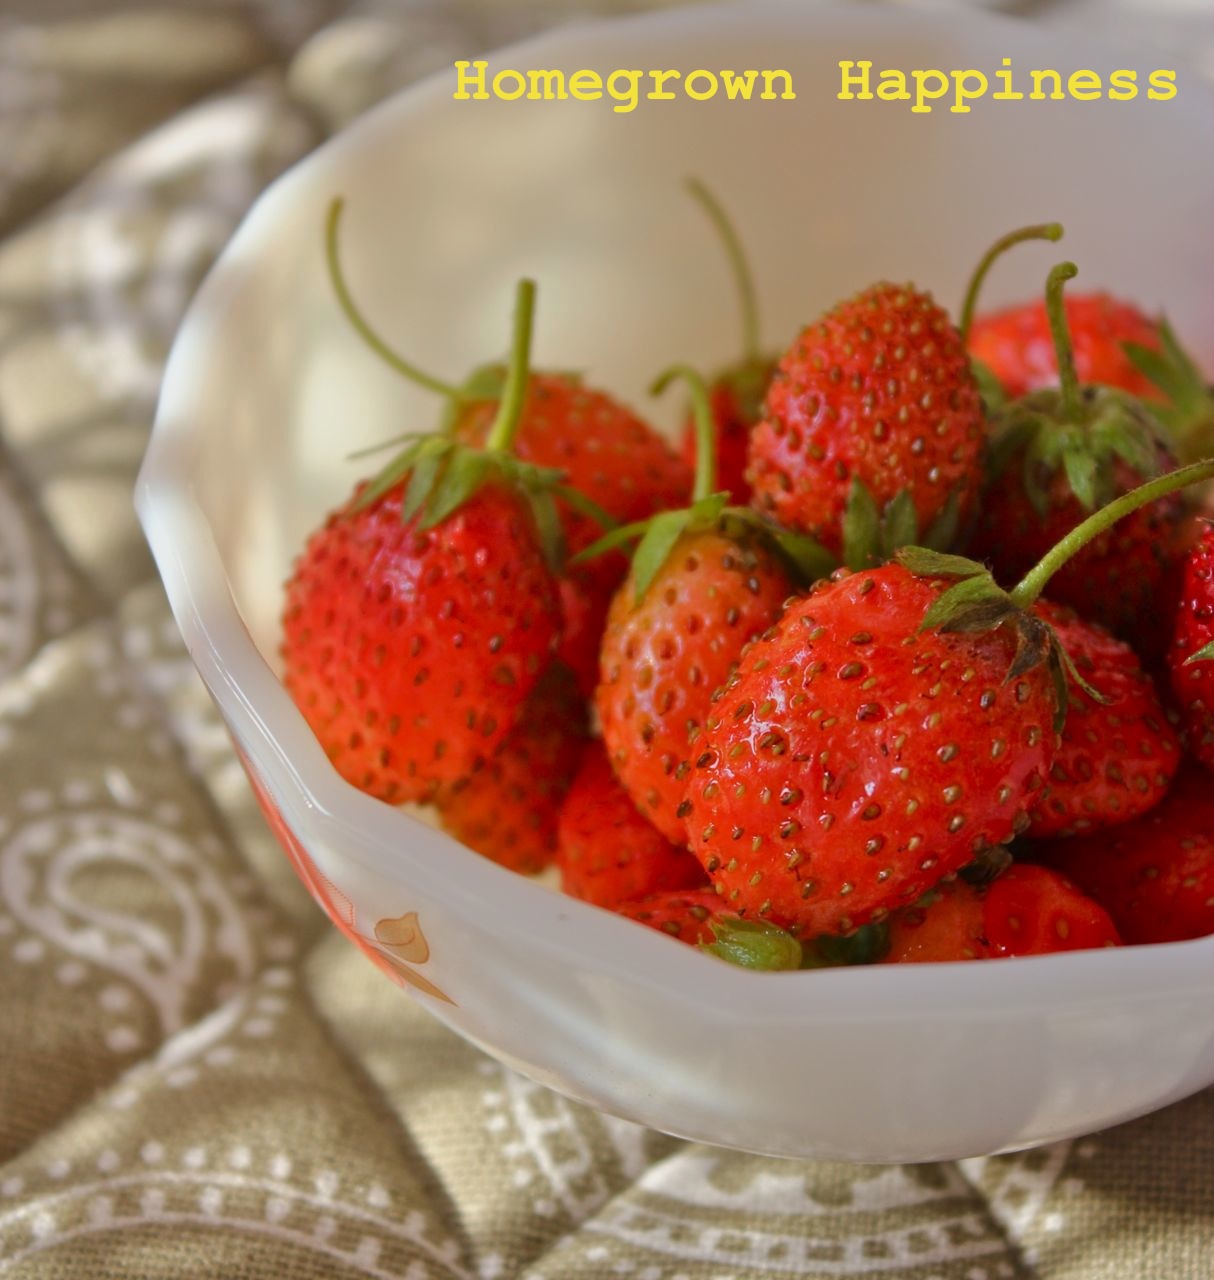
Today, I ended up waking earlier than usual. Early coffee, early breakfast, early lunch and suddenly the day loomed in front of me as though telling me 'do something useful now'. After 3 rounds of doing dishes, cleaning up the kitchen, crazy people like me add another chore to the routine like baking, messing up 3 bowls and adding to the washing up. But fact is, baking rarely feels like a chore. Strawberries are in season. And have I told you, I've found the perfect brand of frozen blueberries (see resource section in the end). And since the cake is mostly sweetened using organic powdered jaggery, I don't feel too guilty about my son coming to the kitchen for multiple servings as a Sunday treat.Try this while the strawberries are in season. If you don't find blueberries, use any other mushy fruit like figs, which are also very much in season. It makes the perfect little bite along with tea or coffee. Simple, rustic and  beautiful. 

And hello! December workshops at Saffron Trail Kitchen are going to be dedicated to a round of Xmas goodies, except for a Salad workshop for a bunch of salad-loving girls. Stay updated by following Saffron Trail on Facebook.


Recipe for Strawberry-Blueberry Tea Cake
Makes 8-10 servings


Ingredients
1/2 cup maida
1/2 cup whole wheat flour 
1/2 tsp baking powder
1/4 tsp baking soda
1 egg
2 tbsp yogurt
2 tbsp cooking oil (neutral tasting like sunflower oil)
1/2 cup powdered jaggery
1/4 cup sugar
2 drops orange oil extract or 1 tsp vanilla extract
3-4 tbsp milk
1 cup finely chopped strawberries
1/2 cup fresh or frozen blueberries
Icing sugar to dust over the top (optional)

Directions
Preheat oven at 180°C. Line a 9X7" baking sheet (to make a sheet cake) or a 6" round tin with baking paper or grease well and keep aside.
Into a large bowl, sieve the dry ingredients. Keep aside.
In another bowl, whisk the egg, yogurt, oil, powdered jaggery and sugar for 3-4 minutes till well combined and frothy.
To this, slowly add the dry ingredients and combine with a whisk or fork. Add 3-4 tbsp of milk as it will be quite thick at this stage and whisk into the batter. Into this mix in gently the chopped strawberries and frozen blueberries.
Scrape out the batter into the lined baking tin. 
Bake for 20 mins in case of 9X7 tin or for 30 mins in case of 6" round tin, in both cases, testing with a skewer if it comes out clean.
Cool for 10 minutes after which you can cut as desired and serve hot with a dusting of icing sugar using a small sieve.
Refrigerate the leftovers - they make excellent reasonably healthy treats for kids' lunchboxes.

Shopping guide:
Organic powdered jaggery: Namdhari's
Frozen blueberries: Delissh brand from Auchan (formerly Spar)

Thursday, 10 October 2013

Lemon Blueberry Muffins - with the kid in the kitchen

By Our Traveler Guide   Posted at  01:33   Saffrontrailkitchen No comments
Saffron Trail Kitchen Update
The Zesty Salads class of 5th October was much fun (pictures). The registrations for the class of 19th October are closed now. There's a weekday class on 23rd October morning with a few seats open. Please follow the Saffron Trail Facebook page for all updates on upcoming classes and share this with your friends in Whitefield & rest of Bangalore who may be interested.


The two week holidays are back and it's that time of the year when I struggle to find ways to interest my pre-schooler boy outside of the iPad or DVDs. Last afternoon, it was baking time. I pulled out the Muffins Bible from the bookshelf, read out the recipe for Blueberry muffins to the son, made him wear his spiderman apron, spread newspapers on the kitchen table and we were all set to bake together. He promptly recruited my househelp as the sous chef's sous chef, i mean, his sous chef. We measured out the dry ingredients, and the boy threatened to stir it with so much enthusiasm that I thought there would be more flour outside the bowl than inside it. When it was time to crack the eggs, he wanted to do it all by himself, breaking each of them like coconuts on the tines of the fork. My househelp's heart was in her mouth, in the fear that how much clean up we'd have to do if he broke the eggs on the floor. Thankfully, it wasn't that much of a disaster. We managed to fill up the muffin cups and when I turned around to put it in the preheated oven, guess what I see? When my attention had turned elsewhere for a nanosecond, he had cranked up oven temperature to 250C, changed the oven setting to 'grill' - one crazy sous chef indeed. After some rectifications, the muffin tin finally went inside and then he sat almost burning his nose by touching it to the oven glass, to wait for them to be ready.


Finally when it was out, he didn't mind his tongue getting burnt but he had to taste them immediately. This morning, I asked him if he could recall how we made the muffins, this is what he drew. This made me a happy mom :)


Lemon & Blueberry Muffins
Makes 15 medium sized muffins


Ingredients
1 cup whole wheat flour
1 cup all purpose flour
1 tsp baking powder
1 tsp baking soda
3/4 cup sugar
3/4 cup oil or 1/2 cup oil + 1/4 cup melted butter
1 tsp vanilla extract
2 eggs
1 cup milk (at room temperature)
Zest of two lemons
Juice of 2 lemons
1 cup blueberries* (frozen or fresh)

Directions
Preheat the oven at 190°C.
In a large bowl, mix the flours, baking soda, baking powder, sugar and mix well with a fork or a whisk.
Whisk the oil / butter, vanilla extract, eggs and milk in another bowl. Add the lemon zest and lemon juice, give it a quick whisk and add this to the big bowl of dry ingredients.
Gently fold in the blueberries.
Line a 12 hole muffin tin with paper liners or grease them well with butter.
Divide the batter between the 12 muffin holes. If there's any extra, make in the next batch, or bake a baby cake with left over batter.
Bake for 15-20 minutes until the tops are golden brown.

Shopping Guide
I used frozen blueberries that goes by the brand Delishh, found in the freezer section of Auchan Supermarket (Gopalan Mall), KR Puram. Rs.215 for 200 grams, they were of reasonably good size and freshness. This freeezer section also stocked frozen raspberries and blackberries. 


My Doodle recipe is a part of Easy Doodle Recipe contest at BlogAdda.com in association with TastyKhana.com

Saturday, 31 August 2013

Healthy Baking: The Really Gingery Ragi Biscuit

By Our Traveler Guide   Posted at  04:30   Nutrition : Fibre rich No comments

Ragi, flaxseed, jaggery, ginger, sesame seeds - you might wonder what these utterly healthy ingredients are doing in a cookie! You might even think it's a complete madhouse of an idea. Ragi / nachni / mandwa / finger millets have been an Indian superfood well before everyone and their uncle started pestering relatives abroad to get them boatloads of quinoa for their daily consumption instead of rice. India, being the world's largest producer of millets, it's high time we showed some respect for our own grains, rather than scrambling after every latest food trend in the world. Ragi, like most other millets, formed a part of prehistoric Indian meals, then completely ignored and considered downmarket in the years that followed, where the rich ate rice, and now slowly the awareness of these prehistoric grains as being nutritional powerhouses is coming back. 

For those who haven't tasted ragi flour, it does have a coarse texture and wont feel as smooth as a refined flour in your mouth. The coarseness comes from the fiber content in ragi. Among all millets, ragi has the highest calcium content (370mg/100g). Its calcium content is nearly 10 times that of wheat (41mg/100g) and 35 times that of rice (10mg/100g). 

Sesame seeds, not only make these cookies look pretty, they are also rich in calcium and good fats, and with flaxseeds rich in omega-3, this is one uber-healthy recipe, perfect for your kid's lunch box treat or with your afternoon cup of tea. If you've baked cookies using traditional cookie recipes, you'd know that most of them call for 1-2 sticks of butter, upto 250 grams! Here, you get 20 biscuits with just 3 tbsp butter. You can, by all means, try substituting butter with ghee, for a richer, deeper flavour. 


Regarding flaxseeds, their nutrients are only absorbed if the seeds are powdered. You get powdered flaxseed in several supermarkets (Nilgiri's in Bangalore) and health food stores. If you don't find them, get the whole seeds, lightly toast 100 grams flaxseeds and powder it in the mixer. Keep in airtight container in the fridge. 


Recipe for Ragi - Ginger Biscuits
Makes 20
Time taken - Under 30 minutes

Ingredients
1/2 cup ragi flour
1/2 cup maida
2 tbsp skimmed milk powder
1/2 tsp baking powder
1/2 tsp baking soda
5 tsp powdered jaggery
1/2 cup crystal sugar
2 tsp flaxseed powder
1 tsp dried ginger powder (sonth powder)
1/2 tsp finely grated ginger*
1/2 tsp chai masala or 1/4 tsp cardamom powder
1/2 tsp salt
3 tbsp cold butter, cut into small pieces
3-4 tbsp cold milk
1 tbsp black sesame seeds + 1 tbsp white sesame seeds (or entirely white)

Directions


  1. Preheat the oven at 180 C.
  2. Keep a baking tray ready, lined with silicone mat or a greased tin foil or parchment paper.
  3. In a large bowl, mix all the ingredients except butter and milk, until well combined.
  4. Add the butter pieces and with finger tips rub the mixture together until it feels like bread crumbs
  5. Add milk 1 tbsp at a time and knead gently till it comes together like a dough. 
  6. Divide into 20 equal balls, rolling each between lightly greased palms. Gently press each ball on the sesame seeds laid out on a plate, only on one side and place the flattened ball, sesame seeds side up, on the baking sheet, leaving a little space between each cookie, for they'll expand.
  7. Bake for 15-20 minutes at 180C until the tops are browned. Cool and store in air tight container.

Tip
*To get finely grated ginger for salad dressings, tea and ginger cookies, store the cleaned ginger roots in a ziploc bag in the freezer. They stay forever, don't get soggy and when grated, give finely powdered fresh ginger. 


Saturday, 6 July 2013

Easy recipe for a simple, all-purpose chocolate cake

By Our Traveler Guide   Posted at  02:29   Fresh from the oven No comments
What's the connection between a little black dress, a good pair of blue jeans and a chocolate cake recipe? Like the importance of a good pair of jeans or a little black dress (okay, may be not) in the wardrobe, everyone needs a good, reliable chocolate cake recipe in their cooking repertoire. A chocolate cake that is soft and springy, with nothing fancy-schmancy about it, something that tastes good just as it is with a cup of coffee or tea - that's the kind I'm talking about. While I have complete respect for the creativity and patience of bakers who make these epic cakes that look like masterpieces, I must confess that my love for all things simple & minimalistic extends to cake. Serve me a simple, no-frills cake and I'm a happy girl. Just one small confession here- I HATE cakes that reek of baking powder. That's the one thing that completely murders a cake for me.

I often love to add carrots, beets, zucchini, pumpkin, lots of citrus zest to my cakes to give them body, flavour and colour. But sometimes I stick to a plain vanilla or chocolate cake. Of course, you always have the option of adding walnuts, cherries, roasted almonds into this batter, dressing it up with fresh cream and berries or splitting it in half and turning this into a black forest kinda cake. This recipe has a lot of potential. But if you are like me, or simply a new baking enthusiast, a slice of this cake as a treat in your kid's lunchbox or in a hamper for your friends will make them a happy camper.


I've made this cake entirely with powdered jaggery, which is simply jaggery sold in powdered form. If you get big chunks of jaggery, run it in a food processor / mixer to powder and then weigh it for the recipe. If you don't have access to jaggery, feel free to use caster sugar. Jaggery gives this a deeper colour and of course there is the advantage of using an ingredient in a less refined form. I've used this recipe quite a few times and the result is an absolutely soft, melt-in-your-mouth chocolate cake AND it doesn't reek of baking powder. 


I've adapted from a recipe I found in BBC Food, halved it, because I didn't want a two layer cake. It's usually better to weigh out ingredients like flour, sugar etc. because it gives a more accurate quantity than measuring out using cups which have a wider margin of error. In case you don't have kitchen scales, then by all means use the metric measurement I have given alongside the weights. It is completely a beginner friendly cake as it uses oil, no creaming of butter required. It's a one bowl cake so no washing up of too many pots and pans. You don't need any fancy electric beaters or stand mixers. A wooden spoon will do. So I hope you are sold out on this recipe!


Easy chocolate cake
Makes one 8" round cake
Less than 45 minutes (just the cake minus ganache / any decorations)

Ingredients


  • 112g plain flour (maida) (~1 cup minus 1 tbsp)
  • 150g powdered jaggery (~3/4 cup)
  • 42g cocoa powder (~1/2 cup)
  • 3/4 tsp baking powder
  • 1/2 tsp baking soda
  • 1 egg
  • 125 ml milk (~1/2 cup)
  • 60 ml vegetable oil (~1/4 cup)
  • 1 tsp vanilla extract
    125 ml boiling water (may not need all of this)

Directions

Preheat the oven at 180C.

Grease and line the bottom and sides of an 8" round cake tin with aluminium foil or parchment paper.

Weigh out all the ingredients or measure them out and add everything to a large bowl except the boiling water. Mix with a wooden spoon for 3-4 minutes, until well combined.

Add the boiling water to this mixture little by little with repeated stirring. The batter will get considerably thin. If you find it getting too watery, then no need to add all of the water.

Scrape this batter into the greased and lined cake tin. Push some of the batter from the center to the sides so that it is a little indented in the center. This will ensure your cake rises uniformly and not doming up in the center.

Place in the center rack of the oven and bake for around 25-35 minutes. After 25 minutes, remove the tin out and insert a skewer / dry spaghetti into the cake to see if it comes out clean. If not, bake for another 5-10 minutes until the cake is thoroughly baked.

Remove from oven, cool for 10-15 minutes. Remove from the tin carefully and cool on a wire rack thoroughly before slicing


Plain chocolate cake not fancy enough?
If you want to do a little bit extra for this cake like for an occasion, you can make an easy chocolate ganache by heating up 100 ml cream and 100g of plain chocolate bar broken into pieces. Keep stirring with a wooden spatula on medium heat until glossy and chocolate is fully dissolved. Let this cool outside for 2 hours during which it will become thicker and spreadable. Once the cake has completely cooled, pour ganache all over the cake and smoothen out with a palette knife all around and on top of the cake. 

You can fill this same batter into cupcake moulds and use the above ganache similarly to top the cupcakes. Add some colourful sprinkles on the top and you have a soft delicious cupcake that could even be better than store-bought ones!


Tuesday, 23 April 2013

The secret to making fully loaded Nachos

By Our Traveler Guide   Posted at  05:38   Snack time No comments
It's been unbearably hot this month in Bangalore. And being the good girl I am, I have been focussing on making the most of the sun, such as sun drying tomatoes, making sun tea and getting my daily dose of vitamin D. 

Those who follow me on Instagram might have seen my gleeful updates on restarting my kitchen garden. We sowed a ton of seeds 3 weeks ago and each morning, I would take my coffee up there to talk to the little seedlings and watch each one come out from the soil and take head count (just kidding there!). As usual, I jumped too soon. There's this nut-job of a stray dog who climbs up on our terrace garden every single night and he has taken it as is life's singleminded motto to dig out every inch of soil in the garden, and along with it every thing that I sow. It is such heart ache for me that I cannot bear to step into the garden and see the mini earthquake unleashed by that 10 kilo dog. He sure was an earthmover in his previous birth! Now that I've vented my anger and frustration, I can get back to talking about good food things. 


Since the last few Fridays, I've been making a big platter of these fully loaded nachos for dinner. It's like a big salad with lots of veggies, beans, cheese and of course tortilla chips. If you get down to baking these chips, then you have a completely healthy, high fibre, high protein snack ready to serve for a house party. I plan to bake these chips in advance for this weekend.

This is the perfect party dish, easily scaled up. You can assemble these in smaller foil containers, sprinkle cheese and bake so it can be shared between two people. 

Preparing the beans:
These are not exactly refried beans because in the former, they are mashed to a coarse paste. Here the beans are pressure cooked until soft but each holding their shape and not mushy. They are then sautéed with some seasonings and kept aside for use in the nachos. You could  make these ahead of time and refrigerate up to 10 days in an airtight container.

Ingredients
1/2 cup raw rajma ( I use the smaller Kashmiri variety) 
pinch of baking soda
2 tsp olive oil
1 small onion, finely chopped
2 cloves garlic, finely minced
1 tsp cumin powder
1 chipotle chilli or a regular dried red chilli, finely chopped or 1/4 tsp chilli flakes
3/4 tsp salt or to taste
2 tbsp finely chopped coriander

Directions
Soak the rajma overnight with a pinch of baking soda.
Drain, wash well and add 1 cup water to this or enough water to completely immerse the beans in a utensil that goes inside the pressure cooker.
Pressure cook the beans for 10-12 minutes. (After two whistles, keep on sim for 10-12 minutes) The cooking time depends on the size of the rajma, for bigger sizes you may have to cook for slightly longer time. You want the beans to be cooked thoroughly, pressing with the back of the ladle or the thumb should mash it to a paste but it should hold its shape. Drain any excess water and keep aside.
In a heavy bottomed pan, heat the olive oil. Saute the onion and garlic with a pinch of salt until the onions are soft. Add the drained cooked rajma, cumin powder, chipotle, salt, coriander. On a low heat, gently saute and let all the seasonings coat the rajma for 5-7 minutes. Once this is done, keep aside until use.


Fully Loaded Nachos
Printable version here
Serves 4

Ingredients
200 grams Tortilla Chips - salted or flavoured (I use the salted variety of this brand and find them extremely crisp with good taste) 
1 big onion, finely chopped
2 medium tomatoes, deseeded and finely chopped
1 large green capsicum, deseeded and diced
1/4 cup cooked corn kernels (optional)
some sliced pickled jalapeño (how much or how little, depends on your preference)
1/2 cup grated cheddar cheese
1 cup of seasoned rajma beans (method above)
Fresh coriander, chopped

Directions
Preheat the oven to 200C. If you are using an OTG with heating coils on the top and bottom, make sure the top heating coil is on, for the cheese to melt.

In a large oven proof dish place half the chips in one layer. Top with half the onions, tomatoes, capsicum, corn, jalapeño, rajma and cheese. Place the remaining chips in a single layer over this and sprinkle all the remaining ingredients with coriander and half the cheese right on top.

Place this in a hot oven for 7-8 minutes until the cheese melts.
Remove from oven and eat right away. If serving young kids, make a small portion separately minus the jalapeños and use plain boiled and salted rajma in their dish.


Some tips:
Use fresh and crisp chips for a crispy crunchy dish.
Once you top with all vegetables, do not waste time. It needs to go into the oven immediately or the tomatoes will start making the chips soggy.
The more cheese you use, the more delicious it will be. Use a sharp tasting cheese for a tastier dish.
If you dont have an oven, this dish will taste good as it is, only the cheese wont be melted :)


Sunday, 19 August 2012

Crustless Quiche using homegrown Swiss Chard

By Our Traveler Guide   Posted at  20:45   Recipe level: Easy No comments
Crustless Chard Quiche 


There's something wonderful about quiches, they fit perfectly as a meal for any time of the day - be it breakfast, lunch or dinner. The only thing that probably deters people from making this is the mess (well, a little) of making and blind baking the crust and the quantity of butter that goes into it and the thought of burning all that butter off the next day on the treadmill. Well, may be that's just me but yes, if the crust is eliminated, the quiche becomes healthy, quick while still tasting delicious. It's also a great way to use up spinach, mushrooms, corn and bits of any cheese you may have in the refrigerator. 

Freshly plucked swiss chard


I used chard because they were just plucked that evening, all fresh and luscious green, you could by all means use spinach, or a combination of other greens and add any other lightly sautéed vegetables like zucchini or bell peppers to this. A spinach quiche is also the best way to make kids eat their greens up without much fuss.


Recipe for Crustless chard quiche 
Serves 2-4

Ingredients
1 tsp olive oil
3 cups of roughly chopped chard (include tender stalks too) or spinach
1 medium onion, sliced
1 clove garlic, finely chopped
3 medium sized eggs
3/4 cup milk 
1/2 cup fresh bread crumbs
1/2 cup cheese (grated or crumbled, as per the cheese used. I used fresh mozzarella, crumbled)
1/2 tsp salt
3/4 tsp ground pepper
Handful of fresh herbs, finely chopped or 1 tbsp dried herbs (Oregano and thyme)

Directions
  1. Preheat oven at 180C. Grease a 6" pie dish or a baking tin.
  2. In a pan, heat olive oil. Add the sliced onions and garlic, lightly saute for 3-4 minutes on medium flame, until onions are soft. 
  3. Add the chard or spinach and saute for 2-3 minutes until just wilted.
  4. In a bowl, whisk the eggs, milk, salt, pepper, herbs well and add the crumbled cheese.
  5. Transfer the chard mix from the pan into the bowl and mix with a fork.
  6. Pour into the greased pie dish. Top with bread crumbs, more freshly ground black pepper and dried herbs and bake for 20-25 minutes until a knife comes out clean.


Serve with a salad for a light lunch. 
Crumbled feta pairs well with spinach and it's a classic combination in Greek cuisine. 
You can easily scale up the recipe and bake in a bigger dish with increased baking times. Leftovers make great breakfast, just microwave for 30 seconds or so before serving.

Tuesday, 14 August 2012

Three Birthdays, One Tart : Recipe for Baked Yogurt Berry Tart

By Our Traveler Guide   Posted at  22:18   Yoghurt No comments


It's lovely when a plan comes together perfectly. Aparna, Arundati, Arundhati, Arundathi (yes, they are three different girls with same name and different spellings) and me, started a little baking group to egg each other to bake and write about it, not that Aparna needs any egging on. We've christened it The Sisterhood of The Traveling Cake Tins and each month we bake something together. 


Behind the beautiful posts, what you wont see is some frantic activity on our (secret) FB group page, where each of us spams recipe links, where to source ingredients, what to substitute, what to do when something seems to be going wrong and of course, pictures and commentary at every stage of the recipe. This time was no different. Also, seeing my post about this exciting group, Monika asked to be a part of it too and now we are six of us.


We decided to bake something to commemorate the legendary Julia Child's 100th birthday. In my early years of food blogging, I won the book 'My Life in France' for showcasing the best marketplace, and this foodblogger shipped this book to me all the way from Switzerland. I've read the book many times and it's never failed to inspire me on how Julia found her life's calling in her 40s, how she had never been interested in cooking until then, how she went on to write the most applauded cookbook of her times and went on to make the most watched cookery show of her time. 


This is a simple recipe, by French cooking standards. I used a simple mix and 'press-into-tin and bake' crust recipe over one that needs resting and rolling. The filling itself it extremely easy-just good yogurt, eggs, sugar, flour topped with fruit and nuts of your choice. I was telling my fellow group members how this makes a perfect breakfast recipe, minus the crust. 


Coming to the other two birthdays, it is the husband's birthday today and we did a little 'cake' cutting ceremony over our morning tea and had it for breakfast. It is also India's 65th Independence Day which makes this dessert fit three special occasions beautifully.


Recipe for baked yogurt berry tart with oatmeal crust

Serves 12-16

For the oatmeal crust:

Adapted from here

1 cup all purpose flour

1 cup oatmeal flour (lightly roasted and powdered the oats)
1/2 cup packed light brown sugar
1/2 tsp baking powder
1/2 tsp salt
100 grams butter, melted and cooled (but still liquid)
1 egg beaten-to seal crust once nearly baked

Line a 9" pie tin with a detachable base or a regular pie tin lined with foil. Grease the foil. 


In a large bowl, mix the flours, sugar, baking powder, salt till combined. Add melted butter and gently bring together everything. Tip this onto the pie tin and smoothen with fingers to line enter base and the side of the tin, pressing down with a flat bottomed cup to even it out and chill in the fridge or freezer for 10-15 minutes.


Preheat oven at 170 C (325 F).


Place a rack in middle of oven and bake this crust for 20 minutes, until nearly golden.

Remove and brush with beaten egg all through and bake again for 5-7 minutes. This prevents the crust from becoming soggy.

While the crust is baking, prepare the filling.


For the filling (adapted from Julia Child's recipe for Tarte Au Yogurt)

3/4 cup powdered sugar
3 eggs
2 cups yogurt (I used Danone-regular fat, after lightly tipping out any whey on the top, no need to drain)
2 tsp vanilla extract
3/4 cup all purpose flour

1.5 cups berries or sliced peaches or nectarines (I used dried wild blueberries and cranberries, rehydrated and drained)

1/3 cup chopped nuts (I used almonds)

In a large bowl, beat the eggs and sugar for 3-4 minutes till pale and thick. Lightly fold the yogurt and vanilla extract into this until mixed. Sieve the flour into this gently, folding it into the mix in batches. Once the crust is baked, pour the mix into it, it will reach almost to the top of the pan. Once you arrange the fruits in the center and nuts around the circumference, the tart is ready to go into the oven for 40 minutes at 170 C (325F), until lightly golden around the edges.


Unmould with the foil or from the detachable base and chill in the fridge for 2 hours or so. Peel off foil and place on a cake tray, slice into wedges. Once such tart will yield 16 slices.


PBS is celebrating Julia Child’s 100th birth anniversary with a “Cook For Julia” right through this week and you can join them by cooking any one of Julia Child’s recipes. The deadline to join the party is 15th August, Julia’s birthday.


Posts by the others in my baking group:

Saturday, 21 April 2012

The healthiest cookies I have ever baked

By Our Traveler Guide   Posted at  04:58   Kid friendly No comments


I don't bake cookies often. Just one simple reason - the quantity of butter that most cookie recipes ask for, totally intimidates me. But a few weeks ago, I was baking cookies for days in a row, starting with these unbelievably healthy flourless, butterless, eggless and almost sugarless cookies which I stumbled upon on 101cookbooks.


I adapted slightly, adding a little honey to sweeten them up a bit, as it was for the kids in the playgroup. The teacher wrote me a note saying they were delicious and no one wanted to share them with anyone. So much for the notion that nothing healthy can ever be delicious.


Thanks Nikki for sharing it with us butter-phobics via Heidi's blog


Oats - Banana - Almond - Chocolate cookies 
Makes around 3 dozen bite sized cookies
Time taken - under 30 minutes


Ingredients
3 bananas, peeled and mashed (riper, the better)
1 tsp vanilla or almond extract
1/4 cup rice bran oil
2 cups oats ( I used Saffola brand)
1/4 cup almonds - roughly pulsed in mixer [if allergic to nuts, use 1/4 cup cornmeal instead]
1/3 cup scraped coconut, fresh or frozen (if frozen, microwave for 30 seconds to soften it)

4 tbsp of honey or brown sugar
1/2 teaspoon cinnamon
1/2 teaspoon salt
1 teaspoon baking powder
150-200 grams of chocolate bar, chopped roughly [Morde or Selbourne is good]


Directions
Preheat oven at 175 Celsius.


In a large bowl, combine mashed bananas, vanilla extract and oil with a whisk.
In another bowl, mix all dry ingredients except the chocolate. 
Add the dry ingredients to the wet ingredients, mix until combined. 
Stir in the chocolate chunks at the end.


Line two large baking sheets with parchment paper. If you have a smaller oven, bake in batches convenient to you.
Drop heaped teaspoon fulls of cookie dough keeping an inch of space between the cookies.
Bake for 12-15 minutes until golden brown.
These will be chewy when cooled. 


Notes
These make a perfect healthy snack for you or your kids. Also simple enough and non messy to bake together with young kids. 
The batch I sent to school, I skipped the almonds as some kids could be allergic to tree nuts. The cornmeal worked well in that. Another batch I baked with almonds, that had a beautiful flavour and crunch, to which I added almond extract.

Saturday, 10 March 2012

On growing strawberries and recipe for Eggless Strawberry Yogurt Cake

By Our Traveler Guide   Posted at  03:55   seasonal eating No comments
My three year old son and me have a morning routine nowadays. After his drink of milk, we go to the garden and check if there's any red peeking out of the strawberry patch. If we didn't do this, the squirrels and ants, who have been blessed with a better foraging sense than us human beings, will get to the juicy berries before we do. We don't get too much, but a small handful a day, to add to cereal or to make a couple of muffins, or to eat as it is. The latter doesn't happen often as I am not very tolerant to acidic fruits and I'm yet to taste lusciously sweet strawberries grown in India. Here, strawberry needs sugar as a partner to make it more palatable. 


But, however little, that sense of joy we get from having watched something grow for nearly eight months, and finally bearing fruit, is such a fulfilling one. These strawberry saplings were planted in June and they quickly propagated and covered the ground, but there was not a single flower in sight even after six months. The newbie gardener that I am, I quickly lost hope. Patience is clearly not one of my virtues, hence I stand to benefit a lot from gardening. I am slowly learning that nature doesn't work at the speed of a 4Mbps internet connection. It takes its own sweet time. And what sweeter time than spring time? I don't need my neighbours to drench me in permanent colours (albeit organic) and hose me with tons of water, to announce the arrival of spring (I'm talking about the one festival I dread, Holi). The new blooms and fruits in my garden had already whispered to me a few weeks ago that spring is not far away...


Just plucked strawberries basking in the morning sun


A few years ago, if someone told me that I could grow strawberries in India, I would have laughed it off. But Bangalore weather is somehow to conducive to growing almost anything. Like my friend @abithaanandh tweeted this morning -
 "Am willing to overlook 11pm deadlines,bad infrastructure,forever 90s music loop- all 4 those few precious hrs in the garden! Tk U #Bangalore"
It is so true. I'll continue to grow strawberries next year too. I'm told they bear better fruit in the 2nd and 3rd year. Only, I'll be growing them in hanging baskets, so I dont have to compete with the ants to pluck the fruit!


I've been wanting to bake a strawberry cake for a while now. Not the types where the fruit is pureed in, but stands out like red jewels, slightly mushy from the baking and a burst of flavour in the mouth, when you bite into it. And somehow, I wanted to pair it with yogurt as I couldn't use eggs in this. A Foodblogsearch didn't find me the kind of recipe I had in mind, so I did my own improvisation. Yesterday afternoon, just before the baking session, I found a bottle of strawberry essence at Nilgiri's, so the fruit, the essence and the jam made the taste pretty intense, but not in the cloying sort of way.


The recipe I'm sharing with you seems to be the most low-fat and healthiest version among all those that I went through as a result of my various searches.

Pin It


This is a tea cake or a weekend breakfast cake. I'm not asking you to believe that it's dessert. Umm...may be with ice cream, yes :)


The texture was very moist and delicate despite not using eggs or butter.
Do give it a try before the strawberry season bids us a goodbye.


Recipe for Strawberry-Yogurt Cake
Eggfree / Eggless / Lowfat
Tea time or breakfast cake
Makes 1 tall 8" cake


Ingredients

¾ cup yogurt
¼ cup milk (skimmed or toned, as you prefer)
¼ cup rice bran oil (or any cooking oil)
¾ cup sugar
2 generous tablespoons of strawberry or mixed fruit jam
1 tsp Strawberry essence or mixed fruit essence (gives a more fruitier flavour, if you don’t have either, use vanilla extract 1 tsp)

1.5 cups all purpose flour OR 1 cup AP flour + ½ cup whole wheat flour (atta)
1 tsp baking powder
½ tsp baking soda
Pinch of salt

Roughly 1 cup finely diced strawberries
Handful of tutti-frutty (optional)

Directions

  1. Preheat oven at 180 C
  2. Grease an 8” round cake tin. If using silicon pan, no need to grease.
  3. In one bowl, whisk the oil, yogurt, milk, sugar and jam.
  4. In another big bowl, sieve the flour, baking powder, baking soda and salt. Make a well. Add the whisked wet ingredients. Fold until they come together. Over enthusiastic beating / whisking is better avoided.
  5. Towards the end, fold in chopped berries and tutti-fruity.
  6. Scrape the batter into the greased tin / silicon mould and bake at 180 C for around 45-55 minutes, checking with a tester if it comes out clean.
  7. After 10 minutes, unmould and cool on a wire rack.
  8. Cut into wedges, dust with icing sugar and serve with tea.

The same recipe will work with raspberries or blueberries to make a blueberry yogurt cake or a raspberry yogurt cake.

See what people have to say about this cake! (via Twitter)


Back to top ↑
Connect with Us

What they says

© 2013 Cook Crowd. WP Mythemeshop Converted by Bloggertheme9
Blogger templates. Proudly Powered by Blogger.