Showing posts with label healthy baking. Show all posts

Sunday, 1 December 2013

Easy Strawberry-Blueberry Tea Cake

By Our Traveler Guide   Posted at  04:03   Recipe level: Easy No comments
Yesterday, I had the 3rd edition of my bread baking workshop - Breaking Bread. We made a rocket-basil-yellow cherry tomato pizza from scratch. Fluffy golden Mumbai pav was served with bhaaji. The cinnamon rolls we made today were turned extra special by adding raisins and orange zest soaked in brandy to the cinnamon-sugar mix. To add to the party we also made a little pull apart loaf using the left over dough spread with chocolate paste- which came out all ooey, gooey and chocolatey and made all the ladies go OOOOH The last one in the bread party was a braided bread dressed with sesame seeds.

Facebook Album: Photos from Breaking Bread -2 

 The best part of the afternoon for me was one of the participants telling me that the pizza was as good as the Toscano pizza and I'm a big fan of Toscano, they serve the best pizza in Whitefield. Photos of Breaking Bread-3 After 4 hours of talking, kneading, baking and walking to and from the oven - I'm invariably wrung-out tired and want to retire into a cave and snooze the whole of Sunday. But rarely does that happen.


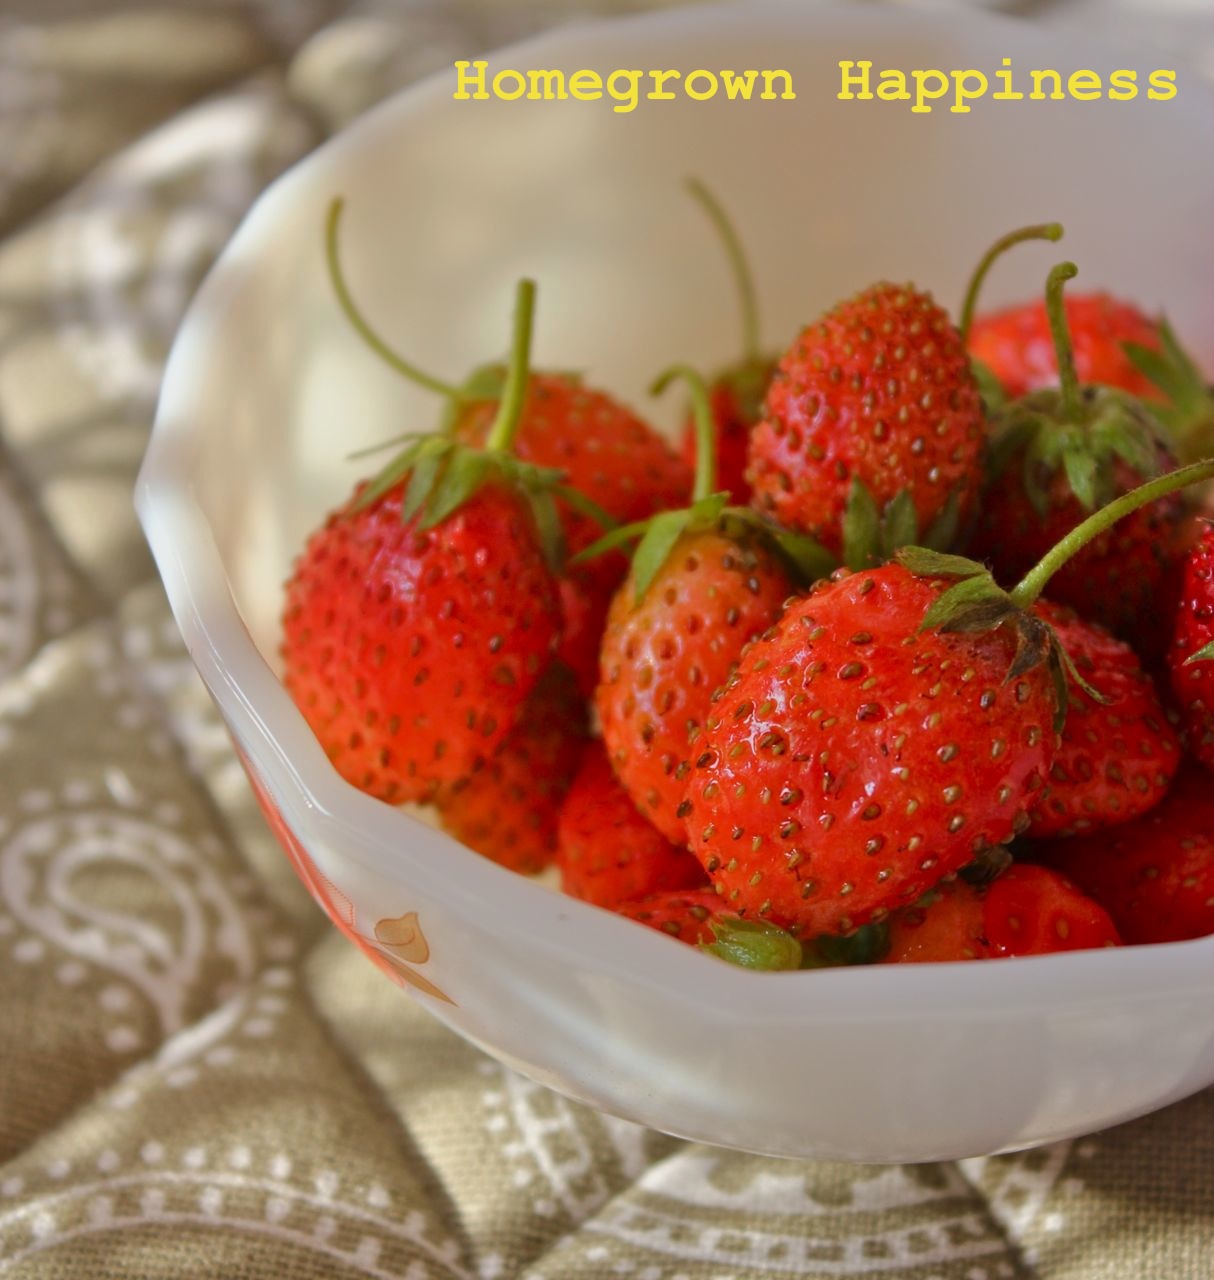
Today, I ended up waking earlier than usual. Early coffee, early breakfast, early lunch and suddenly the day loomed in front of me as though telling me 'do something useful now'. After 3 rounds of doing dishes, cleaning up the kitchen, crazy people like me add another chore to the routine like baking, messing up 3 bowls and adding to the washing up. But fact is, baking rarely feels like a chore. Strawberries are in season. And have I told you, I've found the perfect brand of frozen blueberries (see resource section in the end). And since the cake is mostly sweetened using organic powdered jaggery, I don't feel too guilty about my son coming to the kitchen for multiple servings as a Sunday treat.Try this while the strawberries are in season. If you don't find blueberries, use any other mushy fruit like figs, which are also very much in season. It makes the perfect little bite along with tea or coffee. Simple, rustic and  beautiful. 

And hello! December workshops at Saffron Trail Kitchen are going to be dedicated to a round of Xmas goodies, except for a Salad workshop for a bunch of salad-loving girls. Stay updated by following Saffron Trail on Facebook.


Recipe for Strawberry-Blueberry Tea Cake
Makes 8-10 servings


Ingredients
1/2 cup maida
1/2 cup whole wheat flour 
1/2 tsp baking powder
1/4 tsp baking soda
1 egg
2 tbsp yogurt
2 tbsp cooking oil (neutral tasting like sunflower oil)
1/2 cup powdered jaggery
1/4 cup sugar
2 drops orange oil extract or 1 tsp vanilla extract
3-4 tbsp milk
1 cup finely chopped strawberries
1/2 cup fresh or frozen blueberries
Icing sugar to dust over the top (optional)

Directions
Preheat oven at 180°C. Line a 9X7" baking sheet (to make a sheet cake) or a 6" round tin with baking paper or grease well and keep aside.
Into a large bowl, sieve the dry ingredients. Keep aside.
In another bowl, whisk the egg, yogurt, oil, powdered jaggery and sugar for 3-4 minutes till well combined and frothy.
To this, slowly add the dry ingredients and combine with a whisk or fork. Add 3-4 tbsp of milk as it will be quite thick at this stage and whisk into the batter. Into this mix in gently the chopped strawberries and frozen blueberries.
Scrape out the batter into the lined baking tin. 
Bake for 20 mins in case of 9X7 tin or for 30 mins in case of 6" round tin, in both cases, testing with a skewer if it comes out clean.
Cool for 10 minutes after which you can cut as desired and serve hot with a dusting of icing sugar using a small sieve.
Refrigerate the leftovers - they make excellent reasonably healthy treats for kids' lunchboxes.

Shopping guide:
Organic powdered jaggery: Namdhari's
Frozen blueberries: Delissh brand from Auchan (formerly Spar)

Tuesday, 29 October 2013

Healthy Baking : Savoury Rosemary Coconut Cookies

By Our Traveler Guide   Posted at  00:16   healthy baking No comments

After this healthy Ragi-Ginger cookie, I've been wanting to try out a savoury version using my favourite herb, rosemary. Rosemary features in one of my all time favourite cookies, the Rosemary Shortbread, but that's very heavy on butter. This is my attempt to feature rosemary in a healthier cookie. I've used black pepper and lemon zest to give a flavour boost. Desiccated coconut along with rice flour gives these a nice light texture. These are perfect for those who are trying to avoid sugar, or as holiday gifts for people who don't have a sweet tooth, or simply because you are fed up of too much sugar in the holiday season. Try this healthy cookie and let me know how you find it!


Recipe for Savoury Rosemary Coconut Cookies
Makes 24
Time taken - Under 30 minutes


Ingredients
1/2 cup all purpose flour
1/4 cup ragi flour
1/4 cup rice flour
2 tbsp milk powder
1/4 cup dessicated coconut
1 tbsp finely chopped fresh rosemary
1 tsp ground black pepper
Zest of one lemon
3/4 tsp baking powder
3/4 tsp salt
3 tbsp cold butter, cut into small pieces
3-4 tbsp cold milk
1 tbsp crystal sugar

Method
  1. Preheat the oven at 180° C.
  2. Keep a baking tray ready, lined with silicone mat or a greased tin foil or parchment paper.
  3. In a large bowl, mix all the ingredients except butter and milk, until well combined.
  4. Add the butter pieces and with finger tips rub the mixture together until it feels like bread crumbs
  5. Add milk 1 tbsp at a time and knead gently till it comes together like a dough. 
  6. Divide into 24 equal balls, rolling each between lightly greased palms.
  7. Lightly press into a disc and place on the lined baking tray, leaving some space between each disc so that there's place for cookie to expand.
  8. Sprinkle a few crystals of sugar on top of each cookie. This is optional. You could stick a rosemary leaflet on each cookie instead.
  9. Bake for 12 mins or until the tops turn lightly golden. Remove on a wire rack and cool. The cookies will crisp up on cooling. Save in airtight container.
You can substitute rosemary with fresh or dried thyme for a different flavour.


Saturday, 31 August 2013

Healthy Baking: The Really Gingery Ragi Biscuit

By Our Traveler Guide   Posted at  04:30   Nutrition : Fibre rich No comments

Ragi, flaxseed, jaggery, ginger, sesame seeds - you might wonder what these utterly healthy ingredients are doing in a cookie! You might even think it's a complete madhouse of an idea. Ragi / nachni / mandwa / finger millets have been an Indian superfood well before everyone and their uncle started pestering relatives abroad to get them boatloads of quinoa for their daily consumption instead of rice. India, being the world's largest producer of millets, it's high time we showed some respect for our own grains, rather than scrambling after every latest food trend in the world. Ragi, like most other millets, formed a part of prehistoric Indian meals, then completely ignored and considered downmarket in the years that followed, where the rich ate rice, and now slowly the awareness of these prehistoric grains as being nutritional powerhouses is coming back. 

For those who haven't tasted ragi flour, it does have a coarse texture and wont feel as smooth as a refined flour in your mouth. The coarseness comes from the fiber content in ragi. Among all millets, ragi has the highest calcium content (370mg/100g). Its calcium content is nearly 10 times that of wheat (41mg/100g) and 35 times that of rice (10mg/100g). 

Sesame seeds, not only make these cookies look pretty, they are also rich in calcium and good fats, and with flaxseeds rich in omega-3, this is one uber-healthy recipe, perfect for your kid's lunch box treat or with your afternoon cup of tea. If you've baked cookies using traditional cookie recipes, you'd know that most of them call for 1-2 sticks of butter, upto 250 grams! Here, you get 20 biscuits with just 3 tbsp butter. You can, by all means, try substituting butter with ghee, for a richer, deeper flavour. 


Regarding flaxseeds, their nutrients are only absorbed if the seeds are powdered. You get powdered flaxseed in several supermarkets (Nilgiri's in Bangalore) and health food stores. If you don't find them, get the whole seeds, lightly toast 100 grams flaxseeds and powder it in the mixer. Keep in airtight container in the fridge. 


Recipe for Ragi - Ginger Biscuits
Makes 20
Time taken - Under 30 minutes

Ingredients
1/2 cup ragi flour
1/2 cup maida
2 tbsp skimmed milk powder
1/2 tsp baking powder
1/2 tsp baking soda
5 tsp powdered jaggery
1/2 cup crystal sugar
2 tsp flaxseed powder
1 tsp dried ginger powder (sonth powder)
1/2 tsp finely grated ginger*
1/2 tsp chai masala or 1/4 tsp cardamom powder
1/2 tsp salt
3 tbsp cold butter, cut into small pieces
3-4 tbsp cold milk
1 tbsp black sesame seeds + 1 tbsp white sesame seeds (or entirely white)

Directions


  1. Preheat the oven at 180 C.
  2. Keep a baking tray ready, lined with silicone mat or a greased tin foil or parchment paper.
  3. In a large bowl, mix all the ingredients except butter and milk, until well combined.
  4. Add the butter pieces and with finger tips rub the mixture together until it feels like bread crumbs
  5. Add milk 1 tbsp at a time and knead gently till it comes together like a dough. 
  6. Divide into 20 equal balls, rolling each between lightly greased palms. Gently press each ball on the sesame seeds laid out on a plate, only on one side and place the flattened ball, sesame seeds side up, on the baking sheet, leaving a little space between each cookie, for they'll expand.
  7. Bake for 15-20 minutes at 180C until the tops are browned. Cool and store in air tight container.

Tip
*To get finely grated ginger for salad dressings, tea and ginger cookies, store the cleaned ginger roots in a ziploc bag in the freezer. They stay forever, don't get soggy and when grated, give finely powdered fresh ginger. 


Saturday, 2 February 2013

Savoury sweet potato bake with a peanut crumb

By Our Traveler Guide   Posted at  04:59   vegetable : Sweet potato No comments


Ideas lurk everywhere. The other day I was at my son's classmate's house after school as the kids wanted to play and I was hanging around in the kitchen with the parents, drinking tea and chatting up. The dad was preparing an early dinner and one of the dishes was a savoury starchy bake using potatoes and sweet potatoes. I'm not a big fan of sweet potatoes, but I've always loved the Tamil style sweet potato stir fry curry with sambar-rice or in desserts (yes, brownies!) or randomly in some other dishes. I find that sweet potatoes that we get here need a lot of flavour boost to taste great.

This time, I wanted to try out a savoury bake with them. I had noticed our friend preparing a kind of béchamel sauce to go on top of the layered sweet potatoes, topped with cheese. But since we had no cheese at home, I had to improvise with something else. And that's how the peanut crumb happened. It did provide a fantastic texture to the otherwise melty dish, not to mention upping the protein content of the dish.


Recipe for Savoury Sweet Potato Bake
Serves 3-4

Ingredients
2 medium sized sweet potatoes
1/2 cup fresh or frozen green peas
2 cups milk
1 tbsp butter
1.5 tbsp flour
1/2 tsp salt
1 tsp dried rosemary, crushed
1/2 tsp grated nutmeg
1-2 tsp freshly ground black pepper
1/3 cup roasted peanuts, skins removed (you could use ready available roasted salted peanuts too)

Directions

  1. Preheat oven at 180 C.
  2. In a large pan, bring 2 litres water to a boil with 1 tsp salt.
  3. In a mixer / food processor pulse the peanuts till coarsely crumbed.
  4. Meanwhile, scrub the sweet potatoes well with a scrubber and lots of water to remove all the soil. Do not peel. Finely slice them, and add them to the boiling water. Add the peas too.
  5. Check in 4 minutes, if they are partially cooked. If yes, drain the water in a colander and keep aside the veggies.
  6. In a saucepan, heat butter. Add flour and make a 'roux' until all the flour is absorbed in the butter and turns lightly aromatic. Add the milk with constant whisking. If a few lumps remain, it's okay with this dish. Add the salt, dried rosemary, pepper and nutmeg. 
  7. Lightly grease a mid-sized baking dish. Place the partly cooked sweet potato slices and peas, gently flattening them down. Sprinkle some pepper over the top.
  8. Add the sauce, lightly smoothening it out with a spatula.
  9. Top with peanut crumbs.
  10. Place in the middle of the oven for 30 minutes or so. 
  11. Serve warm with a salad or a soup.
Notes
Feel free to try with other vegetables, similarly sliced - eg: Potatoes, carrots, turnips etc.
If you wish, you could add chilli flakes or chopped chipotle chillies to make this dish spicier. This recipe turns out reasonably seasoned but not spicy at all, suitable for kids of all ages.
You could substitute the peanut crumb with a mix of bread crumbs and grated cheddar. I'm sure that tastes better :)
Leftovers can be warmed in the microwave for 30 seconds and had the following day.


Like what you see here? Follow my Facebook Page. I promise that it's updated much more regularly than my blog with engaging content on food, nutrition and food news and a lot more insights into my kitchen. 

The first picture is also my submission to the Food Photo Contest being run by the most awesome Town Essentials from whom we get most of our vegetables, groceries and other home supplies. If you are in Bangalore, you MUST try their service at least once. It's a fantastic experience to be able to shop for stuff at 5 am sitting under the quilt and knowing that you'll get the freshest produce delivered later that evening. 

Tuesday, 13 November 2012

Chai Spiced Mini Pumpkin Mini Bundts with glaze - #bundtamonth

By Our Traveler Guide   Posted at  07:56   Vegetable : Pumpkin No comments
This Diwali, I didn't get down to making any of the traditional goodies. And I managed to find a valid excuse. Being down with the worst cough episode of the year during the festive season is such a dampener. But when loving neighbours get you home-made goodies, you can't help but muster some enthusiasm and make some stuff that you can share with them. 


Since I've been eyeing these pumpkin-spice loaves for quite sometime, I decided to make them into mini-Bundts with a glaze that will go with these flavours. The Wilton Mini-Bundt tray is the cutest baking accessory, generously given to me by my friend, Preethi, and it always makes the prettiest little cakes. 

Pumpkin and the spices that go into making Chai Masala make a lovely pair. The fragrance and heat from the spices like ginger, nutmeg and cinnamon add a lovely dimension to the bland sweetness of pumpkin. Use the darkest golden colour pumpkin you can find for this recipe. Remove skin, dice into small cubes and boil in some water till soft. Drain and blend in a mixer till you get a fine puree. This can be refrigerated until use. Use in cakes, muffins for moist cakes with minimal use of oil / butter. This recipe uses just 2 tbsp of oil and yet the cakes are extremely moist.


Recipe for Chai Spiced Pumpkin Mini Bundts
Makes 12 - 16 mini bundt cakes
Adapted from : An Edible Mosaic 

Ingredients
3/4 Cup pumpkin puree (explained above)
3/4 Cup packed brown sugar
2 eggs
2 tbsp oil
1 1/4 C all purpose flour
1 1/4 tsp baking powder
1/4 tsp baking soda
1/2 tsp salt
1/2 tsp freshly grated nutmeg
1/2 tsp ground cinnamon
1/2 tsp dried ginger powder

For glaze
3/4 cup powdered sugar
2 tbsp milk plus some more if required
1/2 tsp cardamom essence or vanilla extract or orange extract
1 tsp Cointreau (optional)

Directions
  1. Preheat oven at 175 C.
  2. Using oil, grease the cavities of a mini-bundt pan or two mini loaf pans or a 7" round tin.
  3. In a large bowl, whisk together pumpkin puree, brown sugar, eggs and oil.
  4. In another bowl, with a whisk mix together all dry ingredients.
  5. Add the dry ingredients to the wet in two batches. Incorporate well to make a smooth batter.
  6. Fill 2 heaped teaspoonfuls per cavity or 3/4 filling each.
  7. Bake mini bundts for 15-20 minutes, or until a skewer comes out clean.
  8. Mini loaf pans may take around 30 minutes and round cake tin around 45-50 minutes. Once golden brown on the top and a tester comes out clean, they are ready to come out of the oven.
  9. Mix all ingredients for glaze with a spoon until it is of drizzling consistency. Add a few drops more milk if required.
  10. When the cakes are still warm, drizzle over them.
  11. Serve warm.


Wishing you and your dear ones a very Happy Diwali

I'm sharing this with Lora and Anuradha for their #BundtAMonth challenge Spicy November.
You can check the other lovely Bundts on their blogs.

Saturday, 21 April 2012

The healthiest cookies I have ever baked

By Our Traveler Guide   Posted at  04:58   Kid friendly No comments


I don't bake cookies often. Just one simple reason - the quantity of butter that most cookie recipes ask for, totally intimidates me. But a few weeks ago, I was baking cookies for days in a row, starting with these unbelievably healthy flourless, butterless, eggless and almost sugarless cookies which I stumbled upon on 101cookbooks.


I adapted slightly, adding a little honey to sweeten them up a bit, as it was for the kids in the playgroup. The teacher wrote me a note saying they were delicious and no one wanted to share them with anyone. So much for the notion that nothing healthy can ever be delicious.


Thanks Nikki for sharing it with us butter-phobics via Heidi's blog


Oats - Banana - Almond - Chocolate cookies 
Makes around 3 dozen bite sized cookies
Time taken - under 30 minutes


Ingredients
3 bananas, peeled and mashed (riper, the better)
1 tsp vanilla or almond extract
1/4 cup rice bran oil
2 cups oats ( I used Saffola brand)
1/4 cup almonds - roughly pulsed in mixer [if allergic to nuts, use 1/4 cup cornmeal instead]
1/3 cup scraped coconut, fresh or frozen (if frozen, microwave for 30 seconds to soften it)

4 tbsp of honey or brown sugar
1/2 teaspoon cinnamon
1/2 teaspoon salt
1 teaspoon baking powder
150-200 grams of chocolate bar, chopped roughly [Morde or Selbourne is good]


Directions
Preheat oven at 175 Celsius.


In a large bowl, combine mashed bananas, vanilla extract and oil with a whisk.
In another bowl, mix all dry ingredients except the chocolate. 
Add the dry ingredients to the wet ingredients, mix until combined. 
Stir in the chocolate chunks at the end.


Line two large baking sheets with parchment paper. If you have a smaller oven, bake in batches convenient to you.
Drop heaped teaspoon fulls of cookie dough keeping an inch of space between the cookies.
Bake for 12-15 minutes until golden brown.
These will be chewy when cooled. 


Notes
These make a perfect healthy snack for you or your kids. Also simple enough and non messy to bake together with young kids. 
The batch I sent to school, I skipped the almonds as some kids could be allergic to tree nuts. The cornmeal worked well in that. Another batch I baked with almonds, that had a beautiful flavour and crunch, to which I added almond extract.

Monday, 16 April 2012

Eggless Savoury Muffins with Sun Dried Tomatoes, Cheese and Olives

By Our Traveler Guide   Posted at  23:49   Summer food No comments


It's vacation time at the play group, which means the little boy, when not up to any nefarious activities, is hanging around the kitchen, making puppy eyes at me, saying "Mummy, I want something to eat", which is not entirely a bad thing. He likes to eat most (if not all) the stuff I make, showers me with compliments for my cooking skills and helps rearrange the drawer that holds all the ladles and spoons to a fine mess.

I try to keep homemade stuff like muffins, healthy banana-oatmeal based cookies, cheese squares, cubed watermelon and cucumber and some of his favourite things around for the mummy-i- am-hungry times. Before you jump to the conclusion that I only give homemade-healthy stuff to my son, let me confess that I also give him store bought treats like Nilgiri's tiny drop cookies, lemonade, chocolates and chikki. Everything in moderation.

So, dear reader, tell me what you are doing with your kids in the vacation. What treats? What games? What activities? It would be lovely to hear from you.

Coming to these savoury muffins, they are perfect little bites of wholesome goodness. Flaxseed meal, sun dried tomatoes, cheese and black olives make these utterly healthy and full of fibre and protein.


My son has been crazy over olives, ever since he started eating solid foods. I think, that's one of the genetic traits passed on from his dad, who can go through a bottle of olives in a couple of days. With an olive-loving family like this, I looked up a few savoury muffin recipes in the Muffin Bible with olives in them. Adapted a couple of recipes to come up with this healthier option.


If you follow Saffron Trail on Facebook, you might have seen my notes on making sun-dried cherry tomatoes to put the 40 C Bangalore summer to good use. 4 days and you have the most beautiful salty, tangy, sweet, crispy bits of tomatoes that have captured the sun and boosted their flavour ten-fold. I used a handful of these home dried tomatoes here.


Recipe for Savoury muffins with Sun dried tomatoes, cheese and olives
Time taken - under 20 minutes
Makes 12 small muffins or 9 medium sized muffins

Ingredients
1/2 cup all purpose flour (maida)
1/2 cup whole wheat flour (atta)
150 grams of cheddar cheese or 3 Amul cheese cubes, grated
1 tsp baking powder
1/2 tsp salt
1/3rd cup of sun dried tomatoes
10 black olives, chopped
10-12 fresh sage leaves, finely chopped (or any other fresh herbs like basil or thyme)

1 tsp dried basil
1 tsp dried oregano


2 tbsp flaxseed meal
1/4 cup hot water
2 tbsp olive oil

1 tbsp salted butter + pinch of crushed dried basil

Directions:

Preheat the oven at 200C [Start oven, take temp dial to 200 and time dial to 10 minutes. At the end of 10 minutes, the oven is preheated. You will have to then set the timer as per the baking time, which is around 10 minutes here]

Line a 12 cup muffin tin with paper liners or use individual silicone cupcake moulds, that will fit in a smaller oven.

Mix all dry ingredients in a large bowl with a fork.

In a measuring jug or another bowl, whisk the flaxseed meal with hot water and olive oil till frothy. Add enough water to this to make a total of one cup (which is why doing this is a measuring jug is easier).
Add this to the dry ingredients and stir gently with a fork to bring ingredients together. Too much beating or vigourous mixing will result in hard muffins.
[You can use egg instead of the above flaxseed-hot water. Beat 1 egg, add oil and add enough water at room temperature to make one cup and proceed with the recipe]

Using a spoon, evenly distribute batter between 9 or 12 muffins cups.
Bake for 10-12 minutes at 200C until a skewer comes out clean.

Melt the butter in a small microwave safe bowl for 20 seconds. Add the basil to it. Brush this on the muffin tops once they are out of the oven. Not only does this add a buttery flavour but also helps them keep moist. This is a neat trick to add that buttery taste without using any butter in the baking.

Notes:
You could even bake these in a mini muffin tray to yield 20-24 bite sized muffins for a tea party.
Feel free to change the favours - use thick pizza sauce, more fresh herbs and mozzarella cheese to make Pizza flavoured muffins. Grated carrot, pepper and cheddar is a lovely combination as well. Meat eaters can add crisped bacon bits to the batter. The options are quite endless.
Not just for kids, these muffins that are ready in a jiffy are the perfect accompaniment to a soup for a light meal, even for adults. You could make them spicier with chopped pickled jalapeños, or chopped greeen chillies and ground black pepper. Make a couple of batches and freeze / refrigerate them for breakfast on the go, for a weekday

Shopping Guide:
Ready ground flaxseed is available in most stores in Bangalore. I buy mine from Nilgiri's or Town Essentials - and refrigerate it as it can go rancid quickly.


Saturday, 10 March 2012

On growing strawberries and recipe for Eggless Strawberry Yogurt Cake

By Our Traveler Guide   Posted at  03:55   seasonal eating No comments
My three year old son and me have a morning routine nowadays. After his drink of milk, we go to the garden and check if there's any red peeking out of the strawberry patch. If we didn't do this, the squirrels and ants, who have been blessed with a better foraging sense than us human beings, will get to the juicy berries before we do. We don't get too much, but a small handful a day, to add to cereal or to make a couple of muffins, or to eat as it is. The latter doesn't happen often as I am not very tolerant to acidic fruits and I'm yet to taste lusciously sweet strawberries grown in India. Here, strawberry needs sugar as a partner to make it more palatable. 


But, however little, that sense of joy we get from having watched something grow for nearly eight months, and finally bearing fruit, is such a fulfilling one. These strawberry saplings were planted in June and they quickly propagated and covered the ground, but there was not a single flower in sight even after six months. The newbie gardener that I am, I quickly lost hope. Patience is clearly not one of my virtues, hence I stand to benefit a lot from gardening. I am slowly learning that nature doesn't work at the speed of a 4Mbps internet connection. It takes its own sweet time. And what sweeter time than spring time? I don't need my neighbours to drench me in permanent colours (albeit organic) and hose me with tons of water, to announce the arrival of spring (I'm talking about the one festival I dread, Holi). The new blooms and fruits in my garden had already whispered to me a few weeks ago that spring is not far away...


Just plucked strawberries basking in the morning sun


A few years ago, if someone told me that I could grow strawberries in India, I would have laughed it off. But Bangalore weather is somehow to conducive to growing almost anything. Like my friend @abithaanandh tweeted this morning -
 "Am willing to overlook 11pm deadlines,bad infrastructure,forever 90s music loop- all 4 those few precious hrs in the garden! Tk U #Bangalore"
It is so true. I'll continue to grow strawberries next year too. I'm told they bear better fruit in the 2nd and 3rd year. Only, I'll be growing them in hanging baskets, so I dont have to compete with the ants to pluck the fruit!


I've been wanting to bake a strawberry cake for a while now. Not the types where the fruit is pureed in, but stands out like red jewels, slightly mushy from the baking and a burst of flavour in the mouth, when you bite into it. And somehow, I wanted to pair it with yogurt as I couldn't use eggs in this. A Foodblogsearch didn't find me the kind of recipe I had in mind, so I did my own improvisation. Yesterday afternoon, just before the baking session, I found a bottle of strawberry essence at Nilgiri's, so the fruit, the essence and the jam made the taste pretty intense, but not in the cloying sort of way.


The recipe I'm sharing with you seems to be the most low-fat and healthiest version among all those that I went through as a result of my various searches.

Pin It


This is a tea cake or a weekend breakfast cake. I'm not asking you to believe that it's dessert. Umm...may be with ice cream, yes :)


The texture was very moist and delicate despite not using eggs or butter.
Do give it a try before the strawberry season bids us a goodbye.


Recipe for Strawberry-Yogurt Cake
Eggfree / Eggless / Lowfat
Tea time or breakfast cake
Makes 1 tall 8" cake


Ingredients

¾ cup yogurt
¼ cup milk (skimmed or toned, as you prefer)
¼ cup rice bran oil (or any cooking oil)
¾ cup sugar
2 generous tablespoons of strawberry or mixed fruit jam
1 tsp Strawberry essence or mixed fruit essence (gives a more fruitier flavour, if you don’t have either, use vanilla extract 1 tsp)

1.5 cups all purpose flour OR 1 cup AP flour + ½ cup whole wheat flour (atta)
1 tsp baking powder
½ tsp baking soda
Pinch of salt

Roughly 1 cup finely diced strawberries
Handful of tutti-frutty (optional)

Directions

  1. Preheat oven at 180 C
  2. Grease an 8” round cake tin. If using silicon pan, no need to grease.
  3. In one bowl, whisk the oil, yogurt, milk, sugar and jam.
  4. In another big bowl, sieve the flour, baking powder, baking soda and salt. Make a well. Add the whisked wet ingredients. Fold until they come together. Over enthusiastic beating / whisking is better avoided.
  5. Towards the end, fold in chopped berries and tutti-fruity.
  6. Scrape the batter into the greased tin / silicon mould and bake at 180 C for around 45-55 minutes, checking with a tester if it comes out clean.
  7. After 10 minutes, unmould and cool on a wire rack.
  8. Cut into wedges, dust with icing sugar and serve with tea.

The same recipe will work with raspberries or blueberries to make a blueberry yogurt cake or a raspberry yogurt cake.

See what people have to say about this cake! (via Twitter)


Thursday, 10 November 2011

Oatmeal Prune Cookies spiced with Chai Masala

By Our Traveler Guide   Posted at  03:46   Tamil Lunch Menus No comments
Hello! The line "I'm finally back after a long break" seems to be my opening line for every post in the last few months. A new kitchen, a big oven, nurturing my own little vegetable patch and still I am looking for the inspiration to be blogging regularly.

Last month, Aparna was in Bangalore and some of the Bangalore food bloggers met up over a scrumptious buffet lunch. Much fun was had. Lots of pictures taken. And of course the food critic role played.

Sweet Potato Cupcakes


For our first Diwali in the new house, I made the 7 cup cake, a shortcut mixture and Bakerella's sweet potato cupcakes with chocolate ganache. My version of shortcut mixture was puffed rice (pori) crisped up with tempering of chillies, curry leaves, asafoetida, mustard seeds, peanuts and fried gram dal. To this I added store bought shankarpala, khara boondi and omapodi (sev). This is the best I could manage when my mildly over-inquisitive son didn't even have the school to keep him engaged.

Last weekend, I cooked for a crowd of 9 people (umm okay, not crowd but group). While I was toying between a Mexican and a Lebanese menu, the friends 'demanded' Tambrahm food, politely put as 'food you cook regularly' or 'food you cook well'! So I set aside all my hopes of winning compliments as a truly world-class vegetarian chef and sat down to draw out a Tambrahm menu, as many items as I can possibly make all by myself with a 3 year old hanging around me dangerously!

The menu finally turned out to be :


Kosumalli / Kosumbari (with grated carrot, cucumber, gooseberry)
Crispy Bhindi Raita (crisped in the oven, no deep frying)
Arachuvitta sambar with small onions & carrots
Baby Potato roast Chettinad style flavoured with fresh dill
Yennai Kathrikkai - stuffed baby eggplants ( Google docs link to a friend's recipe notes) 
Store bought Banana Chips
Rice
Mini chocolate cupcakes with chocolate ganache - Adapted from Dan Lepard's Easy chocolate cake recipe

Now that I'm done updating you, here's what today's blogpost is about. My friend Preethi sent me a few baking trays that included this beautiful cookie mould tray in which one can bake x-massy snowflake imprint cookies. I couldn't wait to try baking cookies in this one. The recipe is adapted from the cover of on of the Wilton cookie trays. These imprint cookies will be better with all purpose flour or whole wheat flour rather than chewy oatmeal cookies, so by all means you can bake these cookies on a plain cookie tray dropping spoonfuls of dough or flattening balls of dough on your palm and baking them until golden. The addition of oats makes these chewy and somewhat soft, perfect for your teething babies or aged parents who can't bite very hard biscuits. If you want these crisper, you can pat them thinner and bake for a few minutes more.

The addition of chai masala is my own twist to a traditional American recipe for the only way I eat cookies is with my chai, and this way they will complement each other beautifully. You could substitute ground cardamom, ground cinnamon or a mix of your favourite spices.


Printable version of recipe


Oatmeal Prune cookies spiced with Chai Masala
Makes 12-14 cookies
Time taken Under 30 minutes


3/4 cup oats
1 cup all purpose flour + a few tbsp on the side in case required to bind dough
1/2 tsp baking powder
Pinch of salt
1 tsp Chai Masala ( Everest or any other brand)
1 tsp instant coffee powder (optional)

1/4 cup butter
1/4 cup brown sugar
1/4 cup sugar
1 tsp vanilla extract
1 egg
3 tbsp finely chopped prunes or use raisins
Handful of finely chopped walnuts (optional)
2 tbsp milk


Preheat oven at 180C.
In a large bowl, cream the butter and sugars until light and fluffy.
Add the vanilla extract and egg. Beat some more.
Run the oats for a few seconds in the small jar of your mixer until coarsely powdered.
Add the oats, flour, salt, baking powder and chai masala.
Stir well it all the dry ingredients are incorporated into wet ingredients. Add the nuts and prunes in the final stage of mixing.

Line a cookie sheet with grease proof paper.
Divide dough into 12-14 balls adding some of the reserved flour to the dough if too sticky and tough to handle.
Flatten using fingers dipped in milk and place on cookie sheet leaving adequate space in between cookies as they will expand while baking.

Bake for 10-12 minutes. Remove and cool on a wire rack. Store in airtight container once cooled.

I used a cookie sheet with moulds, so I pressed the dough balls into each of the shape-moulds to get pretty snowflake imprints on them.


Thank you Preethi for this sweetest housewarming gift. Check out her food blog here

P.S.
If you like reading my blog and you are on Facebook, please show some love to my blog page there : http://www.facebook.com/SaffronTrail

P.P.S
It will be nice to meet up the Bangalore Foodbloggers, over food (what else?!) and discuss food (no surprises there) this Saturday once again as we have our first ever Mega Bangalore Food Bloggers' meet up. We have a group on Facebook, so if you are a foodblogger who blogs from Bangalore and you aren't  a part of the group yet, please leave a note in the comments, so we can send you an invite.

Friday, 20 May 2011

Mango Paneer Cake or how we make the HOT summers bearable

By Our Traveler Guide   Posted at  05:19   teatime No comments
So how have you been? It's been quite hot in my neck of the woods, so I have nearly giving up on cooking and also, my outdoor runs. Any sliver of training that was falling in place for the marathon next year has been abandoned until the weather gods turn kinder or until I move to cooler climes. Oh yes, a move is in the offing. I started this food blog when I was in Bombay, then we moved to Hyderabad in November 2008 and it's time to move again. This time, hopefully a permanent move, to Bangalore.

I'm looking forward to this move, more than anything else for the vegetables I will be growing in our terrace garden, the beautiful kitchen with a space for a table where I can chop vegetables, drink tea (or wine, depending on time of the day) and write while looking out from the kitchen window and of course a *big* oven in which lots of baking will happen. I am also happy to report that I have rounded up some enthusiastic food bloggers in the vicinity of my new home and we are going to have some fun food times together. Nandini, Archana, Monika, I hope you girls are gearing up!


Ooh and as some of my friends are teasing me, I am now a "posh girl" after Roshni Bajaj featured me in her story on The Food Network in the Vogue magazine (May 2011) along with friend Madhu Menon. Check the PDF version of the story here (Page 1 and Page 2).


Getting back to the recipe I want to share with you today, it is a seasonal modification of the paneer cake that I blogged about sometime ago, a recipe I found in an old-fashioned cookbook while browsing through a little bookshop in Pondicherry. If you are a mango lover (like a certain Ms. Katrina Kaif, in the literal sense), you can add mango to any dish, be it rice, dal, veggies, brownies, cake and you'll be sure to love it. I'm not crazy for mangoes, in the sense that I wont feel lost at sea if I do not eat mangoes every single day of the mango season. Believe me when I tell you, I know people like that. They cannot go one day without eating a mango or half a dozen of them when they are in season. But yes, I do love the flavour boost a ripe, fragrant mango adds to simple dishes and takes them to another level. So here is the recipe for you. I do hope you get access to beautiful, ripe mangoes wherever you are and when you are tired of eating them as it is, use one of them to make this simple cake.


Mango Coconut Paneer Cake
Low-fat teatime treat
Printable Version of recipe here

This is a variation of the Paneer Cake, using the mangoes that are in season.

Grease three 450 ml aluminium foil tins or an 8-9” round tin.
Preheat oven at 180C.

Grind to a puree
-pieces from one large mango
-½ cup paneer or than from ½ L milk.
-¾ cup sugar
Remove to a large bowl. Whisk in in ¼ cup oil, 2 tbsp vinegar and ½ cup whey water.
Add ½ tsp mango essence or vanilla extract

In a large bowl, sift 1 cup all purpose flour, ½ cup whole wheat flour (atta), 1 tsp baking powder, ½ tsp baking soda and pinch of salt. Mix in ¼ cup dessicated coconut with a fork.

Add the dry ingredients to the wet. 
Add handful of pumpkin seeds or flaked almonds, a few spoons of colourful tutti-frutti and mix until combined. 

Thin with some reserved whey water if batter is too thick.
Divide batter into the three foil tins or one round tin.
Sprinkle some coconut flakes on the top.
Bake at 180C for 20-40 minutes (20 for the smaller foil tins and 40-45 mins for single large tin) until a tester comes out clean.
Serve warm with honey or marmalade if you want it sweeter. It is a very flavourful cake but low on sugar, perfect accompaniment to tea or coffee.

Back to top ↑
Connect with Us

What they says

© 2013 Cook Crowd. WP Mythemeshop Converted by Bloggertheme9
Blogger templates. Proudly Powered by Blogger.