Friday, 16 December 2011

Easy Jam Filled Muffins - A perfect kiddie treat

By Our Traveler Guide   Posted at  00:25   Press/Mentions No comments
December is a hectic month. Socializing, vacation plans, festive madness all around. More so for me as it was my son's 3rd birthday on 4 December and I took on myself what only a few crazy (foodblogger) moms would - ie. Catering to a small crowd of some 18 kids and 2 dozen adults all by myself (a couple of things ordered from outside though, including the cake) and also hand making all the decorations and buntings.

A & N got the most amazing cookies to the party which had the kids all quiet and focussed on eating. They were called World Peace cookies by Dorie Greenspan for a reason, but given that we had kids from a few different countries from around the world, it was almost like the World Peace cookies were being served to a mini UN delegation (which is what our friend Vinod remarked). Since I went through quite some dilemma on what to serve in a kiddie's birthday party with adults, I'm sharing the menu with you, in case any of you plan to do the same, it can give you an idea.


Jelly Boats were a big hit with the kids (and some adults too)


Kids' Menu
Juices
Potato wafers
Banana- Blueberry Bread
World Peace Chocolate Chip Cookies
Cucumber Sticks
Tomato Cheese Spread Sandwiches
Jam Sandwiches
Jelly Boats (Tarla Dalal's recipe)

Kokum Sherbet in recycled Olive / Jalapeño bottles


For Moms & Dads
Kokum sherbet with mint sprigs
Masala Chai (was perfect for the outdoors on a cold winter afternoon)
Rosemary Shortbread
Peanut Butter Brownies (Rachel Allen's recipe)
Hummus with Cucumber Sticks
Kachori with sweet chutney
Jalebis

Everyone, including me had loads of fun and the food was well liked by everyone. The rosemary shortbread was the star for me. What an amazing discovery from the NYTimes website! I have made another batch within a week and nearly everyone whom I've shared it with is in love with this buttery-melt in your mouth-dainty smelling cookie. Because I am a good girl and I believe in sharing, here is the recipe link for you. Remember me for good karma when people want to kiss your fingers after eating this.

Another fun thing that happened this week and it was to get featured in Bangalore TimeOut, complete with a picture of me in my cluttered   not so spic-n-span kitchen. But that's how busy kitchens look like, right? Right! If you subscribe to Bangalore Time Out, check out Page 62.


Back to the subject of this post, these jam filled muffins are a wonderful treat for your kids. Imagine the surprise in their eyes when they break open a plain boring-looking muffin to find their favourite jam oozing out, like a cute Jack in the Box.

Not just kids, I'm sure adults will love it too. Especially if you fill a little adult something inside, like Orange Marmalade or Vodka-infused Jam (Ideas credit : Monika, Sin-a-mon)

I made these in 30 minutes to surprise a friend on her birthday. So it's something you can rustle up in a jiffy even when your kid brings his/her friends home without a notice ;) The muffins were soft and mildly sweet to contrast the sweet jammy filling inside. And a little dusting of icing sugar makes everything look pretty.


Jammy muffin with little extra bit of bitter marmalade for me


Jam Filled Muffins
Adapted from Muffin Bible
Makes 12 regular sized muffins or
24 mini muffins
Printable version of recipe


Ingredients
1 ½ Cups All purpose flour
½ Cup Sugar
1.5 tsp baking powder
½ tsp baking soda

¼ Cup Butter
½ Cup yogurt
¾ Cup Juice (Use one that matches with the jam flavour. I used Dark Grapes juice)
1 Egg
1 tsp Vanilla Extract

Jam (upto 12 tsp, I used black currant jam)
Icing sugar


Directions
Preheat the oven.
Line a 12 muffin tin with paper liners or grease well and keep aside.

In a large bowl, mix well (with a fork) flour, baking powder, baking soda, sugar.

In a microwave safe glass bowl, melt butter (20 seconds).
Add to this cold yogurt, juice and vanilla extract.
Check if this mix has come to room temperature and then add one beaten egg.
(If you add egg to hot melted butter, it will scramble, hence the precaution)

Add the wet ingredients to the dry and lightly combine with a fork until they come together. Do NOT beat or overmix. This will make your muffins rock like.

Spoon a little over a tsp of batter in each muffin liner. Place around a tsp of jam over this and cover with 1-2 tsp of batter, dividing the batter evenly between 12 cups.

Bake at 180 C for 20 minutes or until a skewer inserted comes out clean. (some melted jam may stick to skewer, but that is okay)

Remove and dust with icing sugar.

Tip:
Please note that I added little under a tsp of jam as I thought the jam would melt inside the oven itself and make the muffins look messy. Turns out I was wrong. You can be generous with the jam filling, and it wont spill out as most of the liquid part gets absorbed into the muffin while baking.

In case you want to know where i found the pretty muffin liners - they are from General Food Additives, Sheshadripuram, Bangalore. That one little shop can take care of your baking needs completely.


Thursday, 24 November 2011

Oven Crisped Bhindi (okra)

By Our Traveler Guide   Posted at  00:38   Vegetable : Okra No comments
Bite-Sized Post No.1


To make sure I am blogging more frequently, I'm going to do these bite-sized posts. These are recipe cards made using iPhone pics and coming straight to the recipe without any (much) rambling.


Who doesn't like fried Bhindi / Okra? But truth is okra can soak in a whole oil tank to get crisp. Here's my almost no-oil (compared to the deep frying method) method to get crispy crunchy okra in minutes. Even if you are the lucky ones who doesn't need to watch your waist line, deep frying is such a hassle. So here's the cheat code.


The only thing you need to be careful about is the baking time. At 200 C, once the slices have browned, they can get charred in no time. So, please keep a watch post the 8-9 min mark.


I made this for lunch today to go on top of my (boring) tomato-cucumber-dill salad. And it did take the salad up by several notches.


Text Version Recipe of Crispy Bhindi


Wash bhindi and pat dry.
Thinly slice them.
Take 2 cups sliced bhindi.
Preheat oven.
Heat 2 tsp oil in wok.
Add bhindi slices, toss well to coat with oil.
Line a 10X10 baking tray with foil.
Spread bhindi slices in single layer.
Bake at 200 C for 10-12 minutes until it turns golden brown.
Remove, cool for 2 minutes and use in raita, as salad topping or just like that.
You can sprinkle salt / chaat masala on it once cooled.


(Picture formatted in Instagram)


Friday, 18 November 2011

Lasagna Verde with roasted vegetables and tomato-mushroom sauce

By Our Traveler Guide   Posted at  20:58   party dishes No comments
If there is one country I want to visit, it is Italy. For its wine, its food and the culture. La Cucina Italiana...I find beauty in this food. The vibrant colours, flavours that burst in your mouth tantalizing your taste buds, the freshness of simple ingredients like a raw tomato, fresh mozzarella cheese and locally extracted olive oil, just writing about these is making my mouth water. And how can I leave out Basil? There is NO aroma dearer to me that that of a freshly plucked sweet Italian basil leaf crushed between my finger tips. It transports me to the romance of that far off land. 

Needless to say, when I got the chance of growing my own little vegetable and herb garden, I pleaded, blackmailed, sweet-talked friends into getting me basil seeds when they were coming from abroad. This was the first thing I wanted to grow. And now, I have 4 Indian varieties and 3 other varieties for cooking purposes (Sweet, Thai & Lemon Basil) For those who don't have generous friends like mine, Namdhari's in Bangalore sells freshly packed sweet basil, so fresh that when i get back home from the shop with a packet of basil in my shopping bag, the car smells like i'm in a basil field. Namdhari's also sells basil saplings at very reasonable costs. The kind of sunshine we get in India, it is not a tough one to grow at all.


Coming back to this recipe, lasagna was one of the things I was always scared to make. While I make regular pasta almost twice a week, this was more of a fear of the unknown or the mental block to cooking a dish that has a number of steps. This was my second attempt and except for the pasta sheets which could be more cooked that they were, the tastes in each bite were quite beautiful. Next time, I want to roll out my own pasta sheets. Lasagna sheets should be the easiest pasta to make by hand, given that we are good at rolling out the thinnest of rotis!

The number of steps can seem intimidating, but the sauce can be made ahead, the vegetables roasted ahead of time. What remains is the grated cheese and the assembly, which is hardly time consuming. 
This for me is a perfect weekend dinner paired with a very simple salad and a glass of red wine. I made this for our little impromptu dinner with Nandini & Ajit and they offered me constructive feedback like starting the layering with some watery sauce at the bottom of the pan so the steam from it will cook the upper pasta layers as it bakes in the oven. I have incorporated in the recipe.


The components
Around 9 sheets of lasagna
Tomato Sauce
Roasted vegetables
Grated Cheese ( I used Britannia's Pizza cheese)
Baking tin / glass bakeware
Some more fresh herbs


Making the tomato sauce
8 large tomatoes
5-6 cloves of garlic
1 medium onion
1cup finely sliced button mushrooms
Salt
Handful of fresh basil leaves, finely sliced
1/4 cup red wine (optional)


Place 2 litres of water in a 4L pot. Bring to a boil. Slit crosses on top of tomatoes and gently put them in boiling water. Once the water comes back to a boil, switch off the flame and cover for 5 minutes. Fish out the tomatoes from hot water at the end of 5 minutes, place it in a bowl to get cool. Peel the skins, finely chop and keep aside.

In a large wok, heat 1 tbsp olive oil on a low flame. Before oil gets hot, throw in finely chopped garlic cloves and finely chopped onion. Saute on a medium flame for 4-5 minutes, before adding finely sliced mushrooms. Add 1/4 tsp of sea salt, 1/2 tsp of freshly ground black pepper, any fresh herbs of your choice (I've used fresh basil) and saute till the mushrooms and onions are soft.


At this stage add the finely chopped tomatoes kept aside from earlier step. Add a pinch of salt and bring to a simmer. Add red wine and allow to simmer for 5-7 minutes until it all comes together like a sauce. Check for seasoning and adjust as per your liking. If you find this a little too sour, add a fat pinch of sugar and boil it till sugar dissolves (around 2 minutes). Remove the sauce into a bowl and keep it aside.


For the roasted vegetables
1 medium eggplant
2 large red bell peppers

Slice the eggplant into 1 cm thick slices. Toss with 1 tbsp olive oil and 1/4 tsp of sea salt. Arrange on a greased foil lining a baking sheet.

Bake at 180 C for 25-30 minutes, until soft.

Slice the red bell peppers (1/2" width), toss with 1 tbsp olive oil, sprinkle a pinch of salt and bake similar to the eggplant, until soft but not mushy (around 20 minutes)

Grated Cheese
Place the block of cheese in the freezer for 10-15 minutes. Grease the grater with fingers dipped in olive oil. Grate up to one cup cheese and keep aside. Mozzarella or Cheddar or a mix of both, is fine.

Assembling
Lightly grease a 9X4 or 9 X5 ovenproof pan (glass or tin). Spread 2-3 tbsp of tomato sauce at the bottom with 2 tbsp of water and keep aside.
Bring a large wide pan of water to boil. Add a fat pinch of salt to this. Keep the lasagna sheets ready.
When the water starts to boil, dip the lasagna sheets in boiling water, one at a time for 2 minutes each. Remove and do the first layer in the baking pan, two sheets length wise side by side and one cut to size to place horizontally where the pan is exposed.
Cover this layer with 1/4rd of the sauce and 1/4 th of the cheese. Sprinkle some dried / fresh herbs, freshly ground black pepper over this.
Boil 3 more lasagna sheets, one by one and layer on top of this as explained above.
Cover with a layer of roasted vegetables and 1/4th of the sauce thinly spread in the gaps.
Boil the last three lasagna sheets, layer as explained above.
Pour all of the remaining sauce, any vegetables left over from the previous layer, all the remaining cheese, fresh herbs and some black pepper.

This can be covered and kept aside for a while if you have made this ahead of serving.
Otherwise, place the baking pan in a preheated oven at 180C. Bake for 30 minutes until the pasta is cooked through and cheese melted.

Cut into 6 servings and serve hot with a light salad on the side.

Food Shopping
Lasagna sheets are available in most supermarkets, or you can try and make your own by making pasta dough, rolling it out into thin rotis and cutting them to fit the shape of your pan.
Herbs, both fresh and dried are available at most supermarkets. Keya's or Fabindia for dried herbs and Namdhari's for fresh are my personal preference.


Saturday, 12 November 2011

Roasted Pumpkin Soup with flavours of Lemongrass and Ginger

By Our Traveler Guide   Posted at  17:15   Winter specials No comments
We're not yet fully into winter and yet early morning temperatures are hitting lows of 15C. Bangalore, how I love thee for this. With this soup I made for my son and me a couple of nights ago, I have hit upon another perfectly warming soup recipe for the winter evenings. The lemongrass keeps it fresh and the ginger gives it the warmth.

I buy fresh lemongrass from Namdhari's that comes chopped in batons and sold in plastic bags. I'm talking about the green leaves here and not the stalk that is used in Thai cooking. I keep this in the freezer once opened, and it stays for a long time. My favourite use for this is in my morning Chai. Other than this I use it in Thai curry pastes, or even just simmer in a curry and fish it out in the end for that fresh lemony flavour. I have found that Lemon Basil is a great substitute for lemongrass in tea as well as curries.

This soup is as filling and creamy as it can get, without adding even a touch of cream. You could do an oven roasted pumpkin soup, but I find the flavours very similar even with slow roasting on a stove top pan. I used the yellow pumpkin for this. You could try the same with butternut squash or the darker orange pumpkin too.


Roasted Pumpkin Soup


Recipe for Roasted Pumpkin Soup with Lemongrass and Ginger
Serves 3
Under 30 minutes

Ingredients
1 tbsp extra virgin olive oil
200 grams yellow pumpkin
1 large onion
3 cloves of garlic, peeled
6-7 lemon grass leaves
1/2 tsp grated ginger
1 1/2 cups skimmed milk
Sea salt
Freshly ground black pepper
Paprika
Dried parsley

Preparation
Peel and slice the pumpkin into medium sized pieces
Peel and thinly slice the onion
Slice the garlic

Directions

  1. In a large wok, heat the olive oil. Before oil gets hot, add the sliced garlic and onions. Saute on medium heat for 2-3 minutes. Add the lemongrass leaves and ginger. Stir for a few seconds.
  2. Add the sliced pumpkin. Braise on high heat, shaking the wok every now and then until the slices get a golden brown coating.
  3. At this stage sprinkle sea salt and let this cook uncovered for 5 minutes on low heat.
  4. Add 1/2 cup water, cover and cook the pumpkin now, until it is fully done and falls apart when touched with a ladle.
  5. Remove to a dish and cool. Remove the lemon grass leaves from the cooked veggies and discard.
  6. Once cooled, remove this to a blender and blend to a smooth puree with milk.
  7. Get this back into a saucepan and check for seasoning. The soup will be reasonably thick and very creamy at this stage. Adjust consistency of soup using some water if required, if you prefer a thinner soup.


Serving
Ladle the hot soup into bowls. Top with some extra virgin olive oil. sprinkling of paprika, a tinge of grated ginger and some fresh lemongrass leaves as a garnish.
Serve with sliced toasted baguette which have been rubbed with garlic cloves, or soup sticks.

Tip
You can make this soup spicier by adding a Thai red chilli in the initial stage along with ginger and lemon grass.
You could try adding a tsp of fresh thyme leaves towards the end for a more intense flavour.
Here's a colourful guide on the different commonly available pumpkins and how to cook them.


Thursday, 10 November 2011

Oatmeal Prune Cookies spiced with Chai Masala

By Our Traveler Guide   Posted at  03:46   Tamil Lunch Menus No comments
Hello! The line "I'm finally back after a long break" seems to be my opening line for every post in the last few months. A new kitchen, a big oven, nurturing my own little vegetable patch and still I am looking for the inspiration to be blogging regularly.

Last month, Aparna was in Bangalore and some of the Bangalore food bloggers met up over a scrumptious buffet lunch. Much fun was had. Lots of pictures taken. And of course the food critic role played.

Sweet Potato Cupcakes


For our first Diwali in the new house, I made the 7 cup cake, a shortcut mixture and Bakerella's sweet potato cupcakes with chocolate ganache. My version of shortcut mixture was puffed rice (pori) crisped up with tempering of chillies, curry leaves, asafoetida, mustard seeds, peanuts and fried gram dal. To this I added store bought shankarpala, khara boondi and omapodi (sev). This is the best I could manage when my mildly over-inquisitive son didn't even have the school to keep him engaged.

Last weekend, I cooked for a crowd of 9 people (umm okay, not crowd but group). While I was toying between a Mexican and a Lebanese menu, the friends 'demanded' Tambrahm food, politely put as 'food you cook regularly' or 'food you cook well'! So I set aside all my hopes of winning compliments as a truly world-class vegetarian chef and sat down to draw out a Tambrahm menu, as many items as I can possibly make all by myself with a 3 year old hanging around me dangerously!

The menu finally turned out to be :


Kosumalli / Kosumbari (with grated carrot, cucumber, gooseberry)
Crispy Bhindi Raita (crisped in the oven, no deep frying)
Arachuvitta sambar with small onions & carrots
Baby Potato roast Chettinad style flavoured with fresh dill
Yennai Kathrikkai - stuffed baby eggplants ( Google docs link to a friend's recipe notes) 
Store bought Banana Chips
Rice
Mini chocolate cupcakes with chocolate ganache - Adapted from Dan Lepard's Easy chocolate cake recipe

Now that I'm done updating you, here's what today's blogpost is about. My friend Preethi sent me a few baking trays that included this beautiful cookie mould tray in which one can bake x-massy snowflake imprint cookies. I couldn't wait to try baking cookies in this one. The recipe is adapted from the cover of on of the Wilton cookie trays. These imprint cookies will be better with all purpose flour or whole wheat flour rather than chewy oatmeal cookies, so by all means you can bake these cookies on a plain cookie tray dropping spoonfuls of dough or flattening balls of dough on your palm and baking them until golden. The addition of oats makes these chewy and somewhat soft, perfect for your teething babies or aged parents who can't bite very hard biscuits. If you want these crisper, you can pat them thinner and bake for a few minutes more.

The addition of chai masala is my own twist to a traditional American recipe for the only way I eat cookies is with my chai, and this way they will complement each other beautifully. You could substitute ground cardamom, ground cinnamon or a mix of your favourite spices.


Printable version of recipe


Oatmeal Prune cookies spiced with Chai Masala
Makes 12-14 cookies
Time taken Under 30 minutes


3/4 cup oats
1 cup all purpose flour + a few tbsp on the side in case required to bind dough
1/2 tsp baking powder
Pinch of salt
1 tsp Chai Masala ( Everest or any other brand)
1 tsp instant coffee powder (optional)

1/4 cup butter
1/4 cup brown sugar
1/4 cup sugar
1 tsp vanilla extract
1 egg
3 tbsp finely chopped prunes or use raisins
Handful of finely chopped walnuts (optional)
2 tbsp milk


Preheat oven at 180C.
In a large bowl, cream the butter and sugars until light and fluffy.
Add the vanilla extract and egg. Beat some more.
Run the oats for a few seconds in the small jar of your mixer until coarsely powdered.
Add the oats, flour, salt, baking powder and chai masala.
Stir well it all the dry ingredients are incorporated into wet ingredients. Add the nuts and prunes in the final stage of mixing.

Line a cookie sheet with grease proof paper.
Divide dough into 12-14 balls adding some of the reserved flour to the dough if too sticky and tough to handle.
Flatten using fingers dipped in milk and place on cookie sheet leaving adequate space in between cookies as they will expand while baking.

Bake for 10-12 minutes. Remove and cool on a wire rack. Store in airtight container once cooled.

I used a cookie sheet with moulds, so I pressed the dough balls into each of the shape-moulds to get pretty snowflake imprints on them.


Thank you Preethi for this sweetest housewarming gift. Check out her food blog here

P.S.
If you like reading my blog and you are on Facebook, please show some love to my blog page there : http://www.facebook.com/SaffronTrail

P.P.S
It will be nice to meet up the Bangalore Foodbloggers, over food (what else?!) and discuss food (no surprises there) this Saturday once again as we have our first ever Mega Bangalore Food Bloggers' meet up. We have a group on Facebook, so if you are a foodblogger who blogs from Bangalore and you aren't  a part of the group yet, please leave a note in the comments, so we can send you an invite.

Monday, 19 September 2011

Eggplant salad with spicy greens - From garden to plate

By Our Traveler Guide   Posted at  21:45   Vegetable : Eggplant No comments
Brinjal Blooms - I like these more than the vegetable :)
There are people  you love at first sight and you can't wait to know them more and spend more time with them. Then there are others who you can't decide about. But you wouldn't mind meeting them once in a while. And finally, the third type, whom you dislike right from the world go, but funnily when you keep running into them and get to know them better, they grow on you and you wonder how you ever disliked them in the first place. My relationship with eggplant / brinjal / kathrikkai is exactly of the third type.


As a child, this was the one vegetable I had exemption from as it would make my throat itch whenever I ate it and I promptly declared to my family that I had a brinjal allergy. The fact that I disliked this vegetable, made me convince myself and others even more vehemently that I was allergic to this one. The reverse also happens. When you like something, you are very hesitant to admit that you are allergic to it, especially if the allergy is a mild one. For example, walnuts give me a slight itch in the throat, but that has never made me refuse a walnut brownie, ever!

So coming back to my relationship with eggplants, I first forayed into the world of roasted eggplant recipes like Bhartha ( I make a mean one), Baba Ganoush (always a star in the Mezze platter) and Kathrikkai Pachidi.

Then came the other entries like Brinjal in Sambar, Rasavaangi (this is a most delightful Tambram recipe with freshly ground coconut based masala) and Yenna Kathrikkai. And now, I am eating this vegetable, sliced and lightly grilled on a stove top grill pan in salads! And totally surprising myself with that.

Brinjal was the first to get planted in our terrace vegetable garden and was the first to flower and fruit. My dad even mocks me that people who come to your house for lunch with get Brinjal curry with Brinjal Sambar and Brinjal Pachidi. (Recipe follows)

I'm not one to go to such extremes though. I pluck off those ready for harvest and if i am not cooking with them, I pass it on to friends or relatives who can enjoy home grown, fresh, organic bounty. There's something about slicing a just plucked tender eggplant, thinly slicing it and placing it on a grill pan greased with olive oil. A minute per side, you get these lovely grill marks and they are done. Ready to be tossed into a salad or had as a starter with some pesto on it. I do the same with long slices of zucchini. 


Salad Patch


Growing spicy salad greens like arugula (rocket), mustard etc. (Spicy salad mix from Burpee seeds thanks to Nupur) has made me realise how lettuce is the most boring, tasteless of all salad greens. Especially the wilted stuff served in most restaurants. Every leaf in this mix has a bold taste, spicy, pungent, bitter - each of them come with a personality. 


I make this salad for my dinner at least twice a week. To make it heartier and more filling, add some boiled chick peas / grilled tofu / grilled chicken / paneer / cooked whole wheat pasta to the salad before tossing. 


Dressing - Red Wine Vinaigrette

4 tbsp red wine vinegar
1 tbsp extra virgin olive oil
1/2 tsp Coleman's mustard paste
1 tbsp lemon juice
1/2 tsp sugar
3 small cloves of garlic - finely grated or mashed to a paste
1/2 tsp salt
1/2 tsp ground pepper
1 fresh red chilli deseeded and finely chopped (or green)


Add all the above to a small empty jam jar, shake it up and keep aside.

For the salad
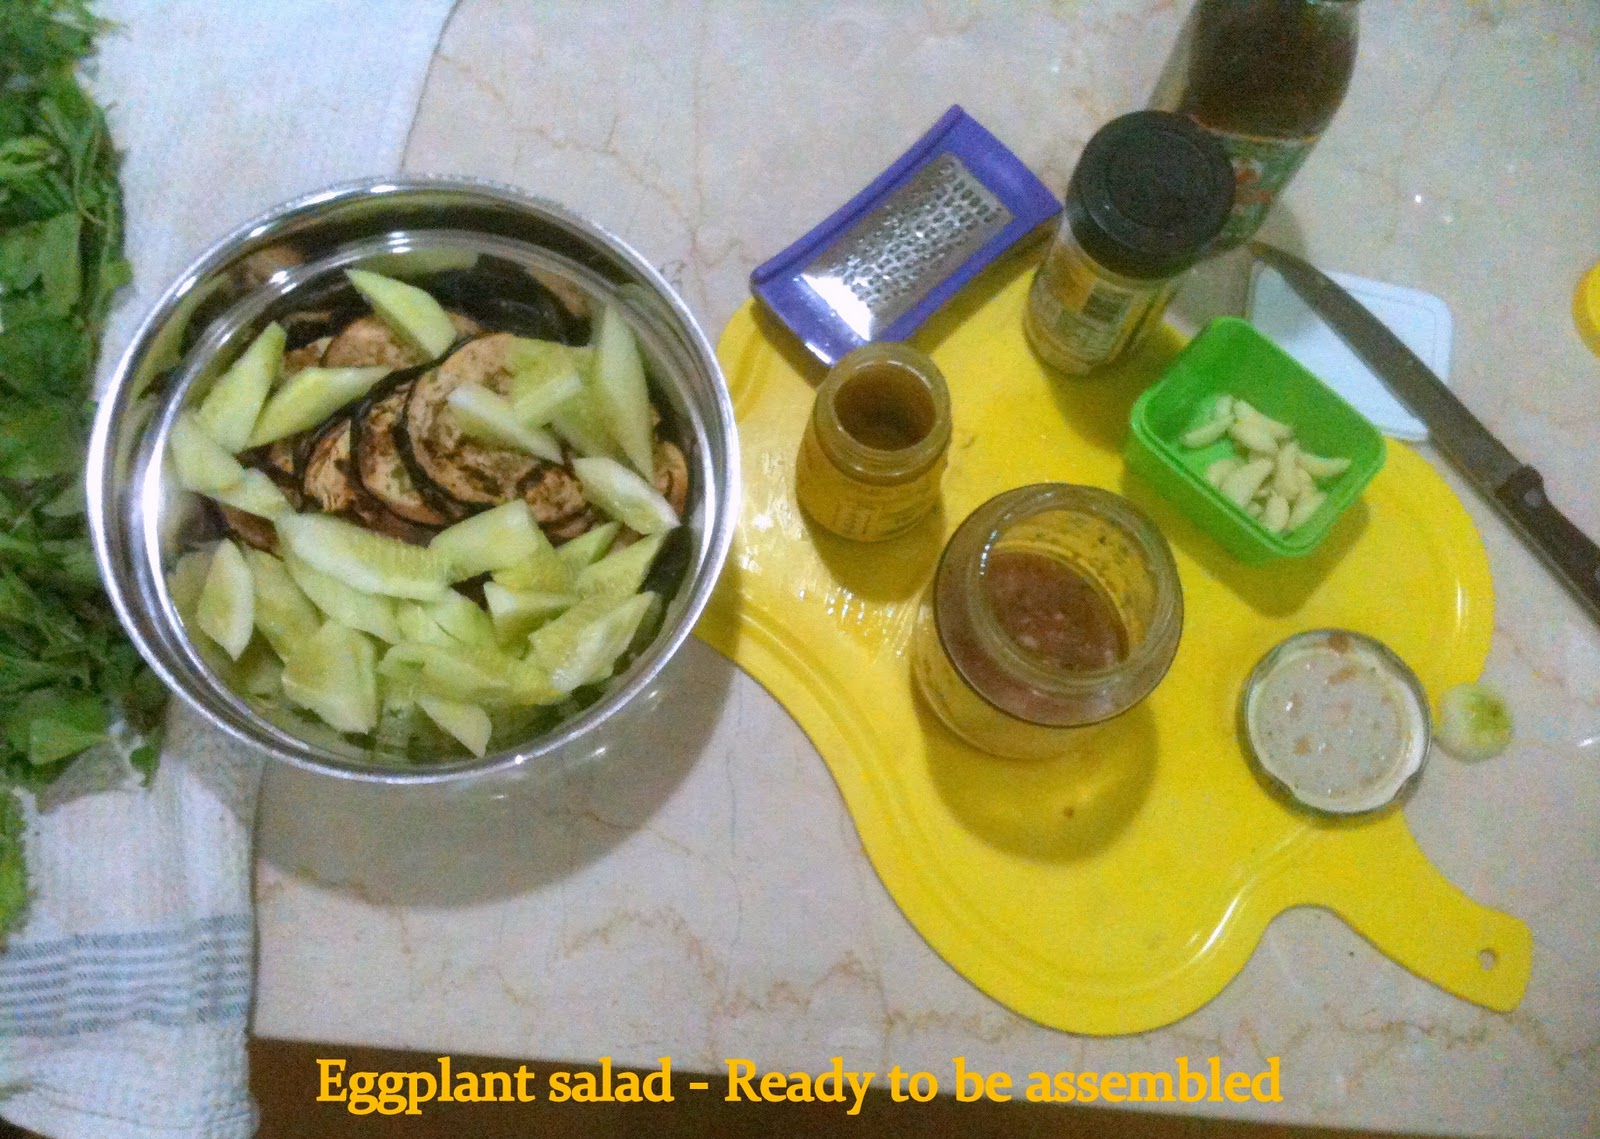
3 small eggplants or half a large eggplant
1 medium cucumber, thick slices into half rounds
2 cups mixed salad greens, washed and dried, torn roughly
1 small red onion, finely sliced (optional)
Add any of the extras given above if you want to have this as a meal.
Handful of mixed fresh herbs like basil, oregano, thyme, sage

Slice the eggplants thinly, not necessarily paper thin. Keep a stove top grill pan on heat. Brush with some olive oil. Arrange the slices in a layer. After one minute you'll see grill marks on the heated side. With a pair of tongs turn all the slices to grill and cook the other side.
Remove onto a plate. Sprinkle a pinch of salt over the slices.
In a large bowl, combine the grilled slices with cucumber, torn salad greens and onion.

Give the jam jar one final shake and pour over the salad just before serving, reserving a few spoonfuls to drizzle over the top just before eating.

This makes one big salad or for 2-3 people as a starter to a meal.

Bangalore Shopping guide
Red Wine Vinegar from Nilgiri's Whitefield
Good quality Mixed salad greens at Namdhari's
Excellent fresh herbs at Namdhari's
Stove top grill pan - I have the Premier brand but there are quite a few in the market nowadays. If you don't have a grill pan, by all means use the Tava for this.
Coleman's mustard - Most supermarkets

Saturday, 3 September 2011

Hello from Bangalore, finally

By Our Traveler Guide   Posted at  18:47   Me to you No comments
Namaskara! Ten weeks after moving to my final destination, I think I am converted. The always-pleasant weather, living away from the bustle of the main city roads, the slow life- it has totally seeped into me. The way Mumbai spoils you with its sheer pace of life and the pace of getting things done, Bangalore spoils you with the weather and the slow life. I don't think I must have complained about the weather more than a couple of times in the last two months, which is a pretty neat record for the weather-cribber in me. 


A couple more things have changed in the last few weeks. 


All my adult life, I have been a morning tea person, unless someone made a steaming hot filter kaapi for me. Lately, tea just doesn't cut it first thing in the morning. My brain cells seem to ask for a stronger dose of caffeine than what comes in a cup of tea.  No, I'm not importing 'kaapi-podi' from ChennaiMadras. The Bayar's brand (not a paid promotion) available in most supermarkets in Bangalore seems to hit the spot neatly. Many people swear by Cotha's but I find the grind quite coarse for my coffee filters.


Before you assume it, no, I haven't given up on tea, not at all. It is simply used to fill up the empty moments in the day, rather than as a morning kickstart. Ginger-ed, lemongrass-ed, cardamom-ed, simple green tea, just about every kind of tea depending on the mood, and of course the weather, leaving empty mugs around in every corner of the house, to be picked up later, of course, when I find that I have run out of clean mugs.


 The next thing in matters of change is my sudden love for Rasam. Either it is to do with the fact that I am growing old, or the steaming cup of tomato-ey spicy liquid pairs well with the Bangalore weather or it is to do with the sour tomatoes that I'm growing in my terrace garden that lend themselves quite beautifully to this.


First two homegrown tomatoes


 I've always maintained that I am a Sambar-person. If there is Sambar and Rasam made at home, I would rather have two helpings of rice with sambar and leave the rasam alone, without a second glance, like a Bottega Veneta lady shunning a Hidesign bag. In fact, when I am visiting my parents and my mom makes just rasam and no sambar, I squarely point it out to her on how she is favouring my sister over me. Needless to say, the sister is a rasam-person. So yes, I have started making a mean rasam, which is not in anyway to blow the trumpet (or saxophone) about my culinary genius, but simply a matter of practice. Yes, that's how often I've been making rasam. If you followed me on Twitter, you'd know. Looks like I have already hit upon the topic of my next blog post. Byebye blogger's block!


Dill growing wild


Apart from the vegetables like brinjals, tomatoes (okay, it is a fruit), okra and carrots- we're being adventurous and trying to grow strawberries on our terrace garden. The gardening experts tell us we can expect to eat some fruit by November, I'm praying the ants don't get to them before I do. 


Strawberry patch


There's dwarf lemons and a dwarf chikoo too, on the terrace garden. Just yesterday, a Cherry bush has been added to the fruit family in the hope that we can eat some homegrown fruit if we are patient enough to care for the trees over the next 2-3 years. Or at least, do the birds some social service.


Sapota


The first to be harvested from the garden was the most sweet smelling lush green coriander and the chutney made using those homegrown leaves tasted most amazing. 


Coriander Flowers


If you have the tiny bit of space, even for a couple of pots, or a tiny area of soil where you can sow some seeds, do it. The sheer joy of watching your food grow from the seed and the joy of turning it into a dish for your family is quite unparalleled. Try sprinkling a few kitchen seeds like mustard or fenugreek into good soil and watch the magic unfold :)


Mustard greens some ten days after sowing seeds
I write a monthly column for Sunday DNA called Tiny Tummies. Here is the link to my page there.


For more gardening / food updates - do follow my Facebook Page: https://www.facebook.com/SaffronTrail


All pics above, taken on on the iPhone (yeah, lazy me thanks to Bangalore weather), processed on the free app Instagram. If you are an iPhone user and you haven't downloaded this app, you've been missing some fine things in life. Here's my Instagram feed.


Now that I've managed to break the long silence, I shall be back soon.


Related reads :


Veggies at home
Herb Mentality - Growing herbs and home and ways to use them

Back to top ↑
Connect with Us

What they says

© 2013 Cook Crowd. WP Mythemeshop Converted by Bloggertheme9
Blogger templates. Proudly Powered by Blogger.